
We may receive a commission on purchases made from links.
Especially if you’re expanding your interest in coffee, different brewing methods have probably captured your attention. In the era of third-wave coffee, there’s no shortage of ways to transform whole beans into a piping hot cup of joe, and there’s no “best” way to do it. The brewing method you choose will depend on loads of factors, such as how you take your coffee, how much counter space you have, the time you want to spend making your morning cuppa, and how much money you want to drop on new equipment. A fancy espresso machine may fit the ticket for some consumers, while others might be in the market for something more compact and budget-friendly. I fall in the latter category of consumer, and my brewing method of choice for years has been a pour-over.
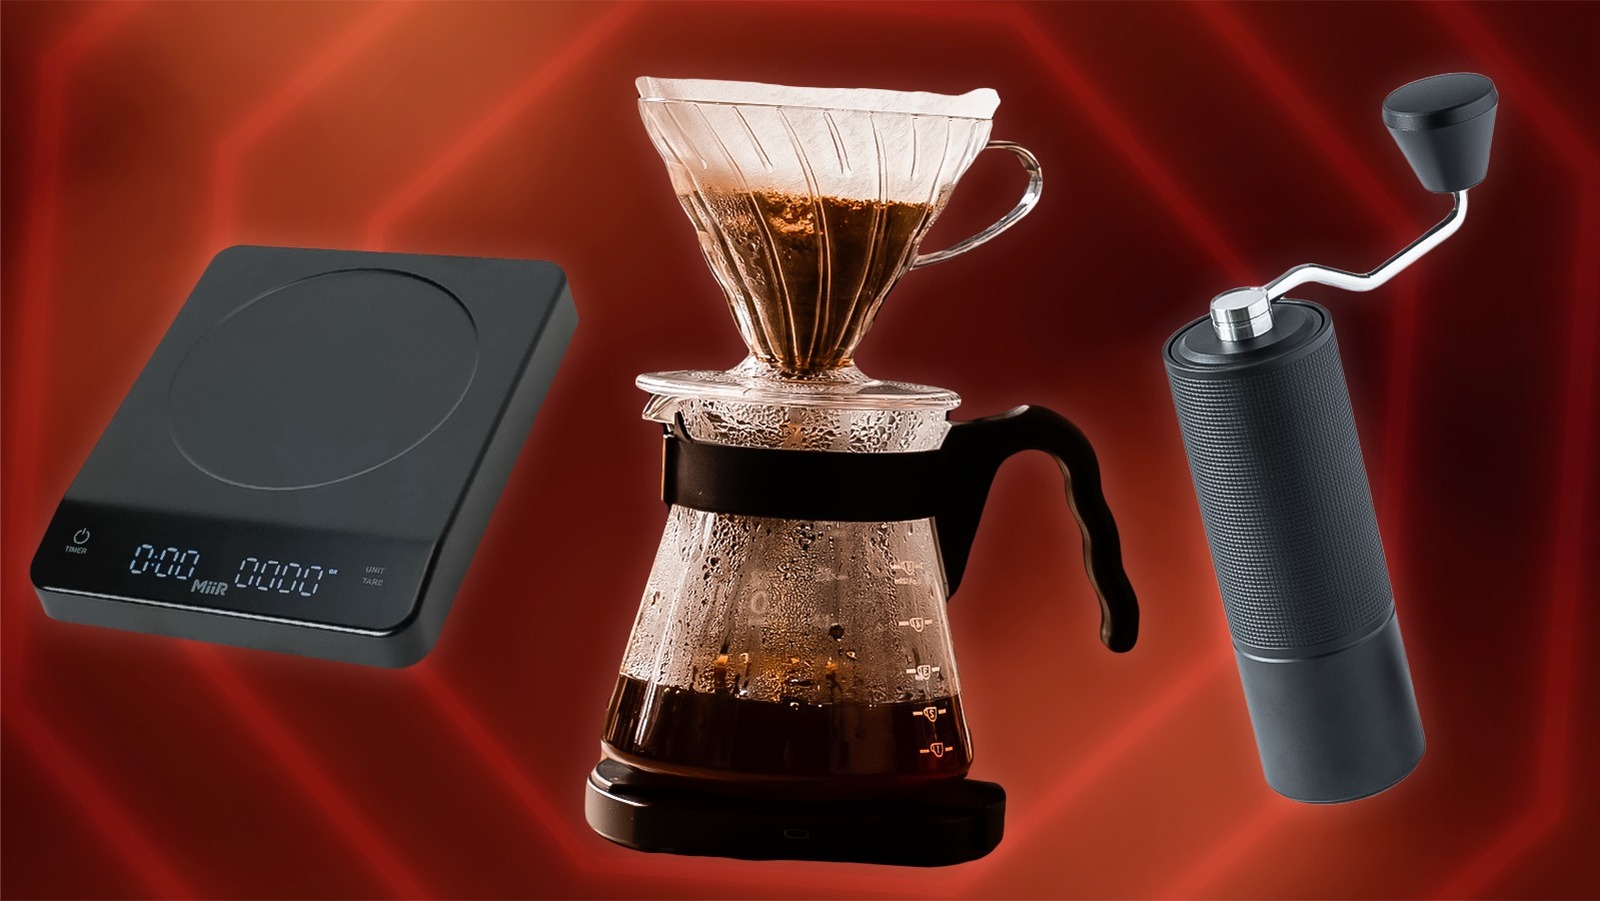
You can use a variety of vessels to make a pour-over coffee. I use a Chemex religiously. It doesn’t take up much space, is only one piece of equipment, and will last for ages (plus, you can grab one for under $50). Choosing your pour-over materials is just the beginning of the process, though. If you’ve decided to start brewing craft coffee at home, it follows that you probably want to craft the best cup possible. I’ve been working in craft coffee for a decade and have been brewing home pour-overs every morning for years — to that end, here are some of my top things to avoid, especially for pour-over newbies.
Not freshly grinding your beans
The first, and perhaps most crucial, step to making a good pour-over is freshly grinding your beans. Coffee starts to lose its freshness rapidly the instant it’s ground — I always avoid pre-grinding coffee when possible, and it makes a ton of difference to the end result. Your coffee grinder might be the most important purchase you could make, and it’s well worth dropping three-digit figures on. I love my Fellow Ode Burr Grinder — it’s an attractive addition to any coffee counter, and mine has lasted me years. It also has multiple grind settings, so you can freshly grind beans for whatever type of coffee you’re making.
There are more budget-friendly options out there, but make sure you purchase a burr grinder rather than one that uses blades. A burr grinder will funnel beans downward through the rotating burrs, ensuring an even grind throughout. Blade grinders, on the other hand, spin to slice the beans, and you won’t get anything close to a uniform grind — you’ll likely notice some super fine grounds and some very coarse, which will lend to a less-than-stellar brewing experience. And if you don’t think freshly-ground beans make a difference, do an experiment. Brew two pour-overs the exact same way, with only one difference — grind the beans fresh for one pour-over, and for the other, use beans you ground the morning prior. Trust me, you’ll taste the difference.
Grinding your beans too fine
Equally as important as freshly-grinding the beans for your pour-over is how coarse or fine you grind them. Your burr grinder will come with different grind settings for a reason — there’s no one-size-fits-all approach when it comes to brewing coffee. An espresso machine will require ultra-fine, powdery grounds, while making a cold brew calls for thick, coarse granules. The ideal grind for pour-overs falls somewhere in the middle, comparable to the grounds in the above photo.
You want your dry grounds to be the consistency of coarse sand or table salt. It should be coarse enough that you feel the individual grounds if you rub them between your fingers, but not so coarse that they feel like thick granules. On my Fellow grinder, I grind my pour-over beans between the four and five markers. You’ll notice a difference in quality depending on how you grind your beans. Beans that are too fine will take a long time to filter the water through them, and you’ll likely end up with a strong, bitter pour-over. Grounds that are too coarse, on the other hand, will brew entirely too quickly and likely result in an acidic, watery brew.
Not using a gooseneck kettle
In addition to purchasing whatever pour-over vessel and coffee grinder you want to use, it’s also in your best interest to buy an electric gooseneck kettle to complete your coffee setup. A gooseneck kettle is a key component to making the perfect pour-over, and getting an electric one with programmable temperature settings can make all the difference. I swear by Fellow’s STAGG Electric Gooseneck Kettle (and yes, this article is my shameless plug for all Fellow’s products — they make my coffee experience a breeze). It looks ultra sleek on my countertop and is relatively compact, and you can program the temperature to the degree.
But why is a gooseneck kettle in particular vital to brewing the perfect pour-over? The answer lies in its titular design feature. The “gooseneck” design allows for an even flow of water that won’t pour too fast. Imagine using your standard electric kettle or even teapot to pour water over your grounds. It would be hard to maintain a steady, light stream and evenly disperse it over the grounds. A gooseneck kettle simply makes for a more comfortable pouring experience and can serve the same purposes as your regular electric kettle; personally, I just swapped my old kettle out for a gooseneck one altogether when I started brewing pour-overs at home.
Boiling your water
I know what you’re thinking: “But, isn’t the water supposed to be hot?” Yes, but it shouldn’t reach a boiling temperature. Remember when I advocated for an electric kettle that lets you program temperatures to the degree? The precise temperature of your water actually matters quite a bit when making a pour-over. Water that’s too cool won’t extract all the flavor potential from your grounds, while water that’s too hot can scald them, resulting in a cup that has a slightly burnt flavor.
Water boils at 212 degrees Fahrenheit, and I recommend programming your machine a few degrees shy of that temperature. I usually brew my coffee with water that’s been heated to somewhere between 200-205 degrees Fahrenheit. This is a good starting point, but you should also adjust your temperature based on the roast of your coffee. Lighter coffees (which is what I typically brew) can handle a temperature of up to 205 degrees Fahrenheit to get the most out of their gentle tasting notes. For dark roasts, on the other hand, you may even want to brew as cool as 195 degrees Fahrenheit, to keep from ending up with a bitter cup.
Forgetting to wet your coffee filter
So you’re all set up — you have your freshly ground beans, your water’s heated up, and your vessel of choice is ready on the counter — and you’re ready to start brewing! Don’t get ahead of yourself, though. Before you pour your grounds into your coffee filter, pour a thin stream of water around the outside of the filter to pre-wet it. This small extra step serves a couple of purposes that will help your final cup taste as good as it can.
First and foremost, pre-wetting your filter helps eliminate any slight papery taste that could end up in your final cup. I’ve noticed this is especially prominent when using brown paper filters. Wetting your filter also preheats whatever vessel you’re using to make your pour-over and will help retain the heat of your final product (to that end, I always preheat my mug with some hot water, as well). Finally, wetting the filter helps “glue” it to the inside wall of your pour-over vessel, allowing for a more seamless brewing experience.
Foregoing a coffee scale
It may sound over-the-top, but trust me — use a scale when making a pour-over if you want your results to be uniform and reliable. I’ll say it until I’m blue in the face. You will not get great results if you’re not weighing your coffee. This goes for both your beans and your water — weigh your beans to the gram before brewing (no, don’t just measure in tablespoons) and weigh your water as you’re pouring it in. For a single cup of light-roast coffee, I’ll use around 23-24 grams of dry coffee and a total of about 350 grams of water.
Experiment time! If you don’t think you really need to weigh your pours, entertain me for a moment. Grab a coffee scale and use it to make pour-overs, and pour a difference of just 10 grams of water between them. It’s a negligible amount on its own, but your brews will taste starkly different from one another. A good coffee scale will measure to the fraction of a gram and will include a timer (which we’ll talk about in a minute). It should be sensitive and read changing measurements quickly so you don’t over-pour. You don’t need to break the bank on a coffee scale, but don’t go cheap, either. I have Greater Goods’ Kitchen Scale, which can currently be snagged for just under $40.
Pouring too slowly or too quickly
Yes, I know, it seems nit-picky of me, but the speed at which you pour your water will also make a difference to your brewing experience. This is a bit of a finicky detail that will vary from coffee to coffee and brewer to brewer, but it’s worth playing around with different pouring speeds to see how it affects the flavor of your finished product. I’d recommend aiming for a 15-second or less window for each of your pours — this is a slow enough speed to allow you to pour evenly, but it’s fast enough to maintain a timely brewing process.
You want to pour water over the coffee grounds in a slow spiral, starting in the middle and moving outward. For the first pour, or the bloom pour (which we’ll talk about in a minute), aim to get to 100 grams of water within the first 5-15 seconds of your pour. Depending on the type of coffee I’m brewing, I’ll finish the brew in either one or two more pours, finishing each within 15 seconds. I’ll talk more about timing your pours next — for now, just keep in mind that 15-second window from the start to the end of your pour.
Not timing your pours
If you’ve ever gotten a behind-the-scenes experience at your local coffee shop, you may have noticed the baristas using scales with timers as they’re pulling shots. This is for good reason — having a shot “dialed in” means that it will pull a certain weight in a certain range of time to achieve a smooth drink with a slightly sweet end. Falling outside this time range will leave you with a shot that is either too bitter or too acidic. The same principle applies to pour-overs.
You want to aim for a steady flow of water through your pour-over, never letting your grounds get too dry or soaking them for too long. Again, this will vary slightly from coffee to coffee, but a good rule of thumb is to proceed as follows: Start your timer when you start your first pour, and finish the first pour within the first 15 seconds. Once your timer gets to the one-minute mark, begin your second (possibly final) pour and finish that pour within the 15-second mark. Your pour-over should be done brewing by the time your timer reaches the three-minute mark.
Going too heavy on the bloom pour
My personal favorite part of making pour-overs is that first pour — the bloom. If you’re using freshly ground, high-quality beans, the first pour should see them “foaming” like in the picture above. The bloom pour releases the coffee’s oils and gases; you’ll likely get strong wafts of its aroma at this point, and you can view it as a kick-start to the brewing process. Getting a good bloom pour can be a great indicator of what your final cup will taste like. To that end, you don’t want to over-pour at this point.
How big your bloom pour is will depend on many factors, but a good rule of thumb is to start with a 2:1 water to coffee ratio on your bloom pour. This means you’d bloom 25 grams of coffee with 50 grams of water. Yes, my personal parameters fall outside of this — I usually bloom my coffee with 100 grams of water for 23 grams of coffee, but again, I’ve dialed in this metric to my personal preferences. I could nerd out on your here, but instead, I recommend doing your own research and experimentation until you dial in your perfect brew.
Brewing every type of coffee the same way
The exact specs of your pour-over will depend on a variety of things, including the origin country of your coffee beans, how light or dark they’ve been roasted, and your desired strength. That said, it makes sense that you won’t want to brew every type of coffee the same way. You probably recall that I’ve said “it depends” a lot in this piece, and that’s because it really does. If I may wax poetic for a moment — coffees are like children, and each requires different types of nurturing to achieve the best results.
Depending on who you’re buying from, you might happen upon a brand (or even an individual bag) with specific pour-over instructions that the roasters have dialed in for you. If you have that info, it will provide a decent starting point. But learning to taste and adjust your coffee is invaluable to making the perfect pour-over. If your coffee ends up too bitter, it likely took too long to brew, and you may need to try a coarser grind or faster pour. I often go slightly coarser and faster with darker roasts, where I’ll err on the fine side, and a decent pouring time for light roasts. The most important thing is to have fun with it!
Not adjusting for big-batch pours
Do you need to scale up your pour-overs to please a crowd? Unfortunately, it requires more than a couple of simple multiplication problems. First and foremost, make sure your brewer is large enough to accommodate the amount of coffee you want to end up with without reaching the bottom of your filter. If it isn’t, you’re best just planning to take the extra time to make multiple pour-overs for the best results.
If you do have a larger pour-over vessel, you’ll need to adjust your brewing process slightly. Go ahead and scale your dry coffee weight up to account for the number of people present. Grind your coffee slightly coarser than you normally would — as there’s a larger volume of coffee in the filter, it will take longer for the water to filter through, and a coarser grind will keep the water from flowing too slowly. Similarly, time your brew, but expect it to take longer. A brew that usually takes three minutes to complete for a single serving should take about five minutes to complete multiple servings. Honestly, I’ve never had a perfect experience brewing big-batch pour-overs — I find it to be a finicky process, but with some tweaking, I’ve landed on big-batch brews I’m happy with.


