In recent years, sous vide has gone from a fancy cooking technique used only in professional kitchens and fine dining to something accessible to home cooks. Home sous vide machines are widely available and generally inexpensive, especially compared to years past. It’s also pretty easy to operate and useful for home cooks, requiring little work. As a culinary professional, I’ve worked with sous vide machines often and found it useful in my own home cooking. The benefits of sous vide cooking are plenty. The reason it’s different from other cooking methods is that the water is set at a fixed temperature and stays consistent the entire time you have it on. This achieves an even cook from the outside of your food to the inside. Thus, you won’t risk overcooking your food.
Now, there are all types of foods you can sous vide, but perhaps one of the best choices is chicken — more specifically, chicken thighs. When cooked correctly, chicken thighs can be super flavorful, moist, and tender. While they might be a little tricky to cook evenly with other methods, sous vide makes them easy to get right — with just a little know-how, of course. Here are some tips for cooking juicy sous vide chicken thighs.
Marinate your chicken
If you’re new to sous vide, or just a beginner, you might be nervous to play around too much with your proteins before placing them in the water. Or perhaps you think that the simpler you dress your chicken, the better — so the meat can be center stage. In truth, sous vide isn’t magic, and it’s not going to make your food taste great on its own. In fact, one of the biggest mistakes people make with sous vide is thinking they don’t need to marinate the chicken or meat they’re cooking. Sous vide is simply another way of applying heat, and you can still follow other basic principles of cooking while doing it. Marinating your chicken allows flavors to seep into the meat and make every part of it as tasty and juicy as possible.
Another tip is to give your chicken some time to sit in the marinade. The longer you leave it, the more opportunity it has to absorb all the delicious flavors. In my experience, it should be marinated for at least 30 minutes, but ideally, you want to give it a couple of hours. You also don’t need an intricate or complicated marinade. You can make your own simple recipe by mixing some oil with whatever spices and seasonings you like. You can also use a store-bought sauce or marinade that you love. There are no rules for what goes into it, so feel free to personalize it to your liking.
Use bone-in thighs
You may be tempted to get some boneless chicken thighs to sous vide with, but if you want the best possible tasting chicken, I would advise against it. Sure, boneless thighs are easy to eat, since you have easy access to meat without a bone in the way, but you could be sacrificing flavor in the process. Cooking any meat on the bone gives you a more flavorful result – I find that this applies to everything, no matter the type of meat or the cut. Chicken thighs are no different.
Sous vide can intensify flavors as everything cooks slowly, allowing for flavor to develop. Bones add a lot of flavor to meat, thanks to their marrow and the connective tissue and fat surrounding them. As they sous vide, they release all that goodness into the meat. Other than flavor, they also add to your meal nutritionally, with nutrients and collagen. Plus, you can also save the bones afterward and turn them into a stock.
Keep the skin on
One thing sous vide absolutely doesn’t do is brown or crisp your meat — which is one of the biggest downsides of the cooking method. As such, you may want to take the skin off your chicken thighs. In a sous vide, chicken skin just becomes really soft rather than crisping up. However, browning isn’t always everything, and you can (and should) brown or sear them in a pan afterwards. Rather, you should leave the skin on your chicken thighs because the layer plays an important function: The fatty, blanket-like cover helps prevent your meat from drying out.
As your chicken thighs cook, the fat from the skin slowly melts into the meat, adding moisture and a whole lot of fatty flavor, too. Even if you don’t want to eat the skin, you should still keep it on during the cooking and remove it afterwards. If juicy chicken thighs are what you’re after, the skin is key.
Season liberally, but don’t overdo it
One of the essential steps to a great-tasting piece of chicken is to season it well. Underseasoned chicken can leave you unsatisfied and waste a perfectly cooked meal. Plus, you don’t want to have to season meat after you cook, because it will only coat the top of the meat. If your chicken is well-seasoned, the salt and other spices you may use will have time to permeate the chicken as it cooks. The trick with sous vide, however, is to make sure not to over-season it. In my experience, sous vide cooking can intensify the flavor. This is because everything is cooked in an insulated environment, and everything from the fat and the meat to the seasoning and the juices, all cook together and cannot escape.
So, what’s the sweet spot between seasoning enough but not too much? This is tricky because everyone has a different idea of what they consider to be enough seasoning. For this reason, it’s best to stay on the more conservative side — especially if you tend to be heavy-handed. You can always add more seasoning afterward, but you can’t take it away.
Use aromatics
Some people think a sous vide should be used to cook meat in its purest form, which can make them hesitant to add in extra flavorful additions. But you shouldn’t stop at just basic seasonings. Instead, you should add all the flavor elements you would normally pair with your chicken, including aromatics. Aromatics can be anything from garlic, chilis, onions, shallots, ginger, lemongrass, and scallions to fresh herbs like thyme, basil, cilantro, and more. And if you’re a fan of spices, you could also use whole cardamom pods, cumin seeds, black peppercorns, star anise, or whatever else you fancy.
Adding in a few choice aromatics can really take your chicken thighs to the next level. They’ll infuse into the meat, and the long cooking time of the sous vide will give them enough time to flavor everything. Use your sous vide to make your favorite Thai-inspired chicken thighs, use some Middle Eastern or South Asian spices, or give your recipe an Italian twist. It’s all allowed, and frankly, for juicy and great-tasting chicken, it’s encouraged.
Layer your thighs evenly in your vacuum bag
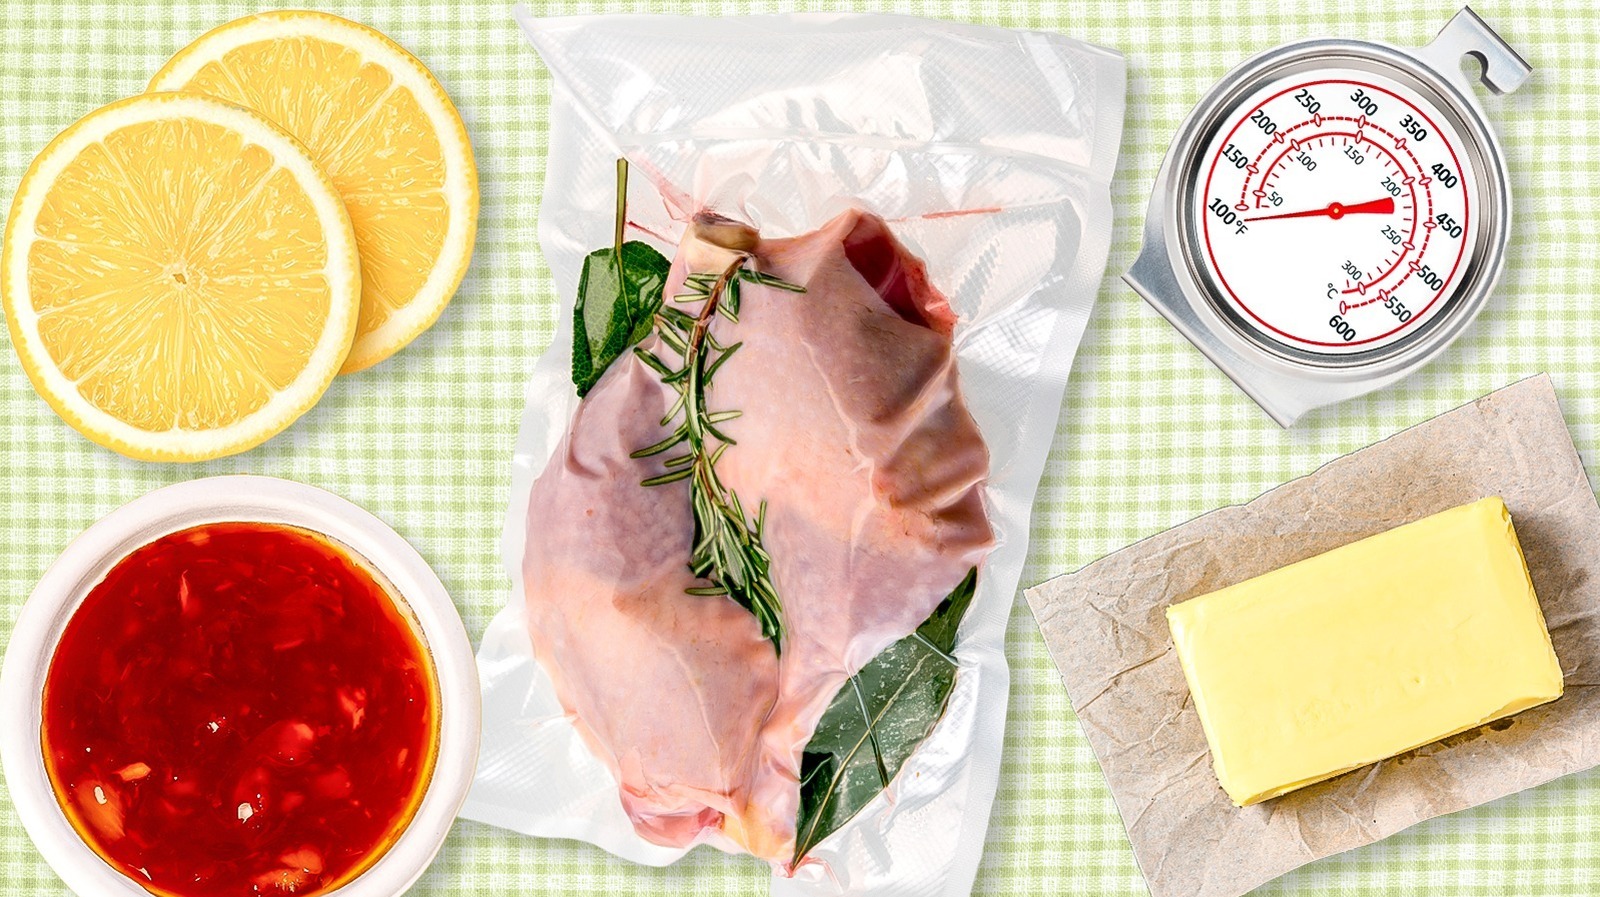
How you place your food in your vacuum bag is important. Whether you’re using resealable bags or a proper vacuum bag, it needs to be airtight. But before you seal it up and put it to work, you’ll need to make sure the chicken is placed correctly in the bag. To ensure that everything cooks evenly, lay out your ingredients in an even, single layer, making sure they are no overlapping pieces.
Depending on the size of your chicken, you may want to use one piece of chicken per bag. However, you shouldn’t be deterred from using a larger bag and placing all your pieces in there. In my experience, there’s no risk of overcrowding a bag, as long as you place everything evenly. It’s still going to cook consistently if you’ve placed each piece in one layer and not on top of one another. The bag should have a uniform shape all around, and one side shouldn’t have more chicken than the other.
Line your chicken with lemon slices
One nifty trick I love doing with chicken thighs is placing lemon slices in the vacuum bag with the chicken. Lemon goes well with many foods, especially chicken. It offers a delightful brightness and aroma. Other than taste, lemon also helps to add moisture to the sous vide bag, thereby keeping your chicken juicy as it cooks.
It’s better to cut up some lemon slices and add those to your bag rather than simply squeezing some lemon juice onto your chicken. Sure, the juice will add a pop of acidity, but its flavor can also be a little too harsh. The slices will slowly flavor the meat, without overpowering it. At the same time, the peel will perfume your chicken, and the warmth from the water allows the natural oils in the lemon peel to come out. Make sure to evenly spread your slices in a flat layer on top of your chicken pieces.
Spread out your aromatics so they reach every piece
Sous vide is unlike other cooking methods because you don’t have a lot of movement while cooking. It really is a “set it and forget it” type of process. This is different from something like sauteing, where you’re shaking or tossing your food around in a pan or stirring things in a pot. Even if you’re roasting something in the oven, you’ll need to check on it once in a while to toss or baste it. All this movement allows for the ingredients to mix and blend with everything. Unfortunately, in sous vide, things stay pretty much in place due to the vacuum-sealed bag. So, in order to get your flavors to really blend in, you’ve got to spread all your seasonings out, including herbs, onions, garlic, and spices, as evenly as possible.
When you’re adding your aromatics to your chicken, make a concerted effort to move your seasoning around so that it reaches every piece of chicken. That means you’ve got to get your hands in there and get dirty.
Don’t forget to add a fat
One of the common myths about sous vide is that you don’t need any fat. While you may not be browning or searing anything, fat is still important. Sous vide does mean you’re cooking in water, but the food doesn’t touch the water, which it would if you steamed, boiled, or poached it. While these other water-based cooking methods do not need any fat, you will for sous vide. Oil or butter will keep your chicken moist, juicy, and tasting good. The type of fat you use is up to you. If you love the taste of olive oil, then that’s a good choice. You can also use ghee, coconut oil, sunflower oil, peanut oil, or even some chicken fat to really amplify the chicken flavor.
Fats like butter and oil add extra flavor, but they have another function in sous vide. They can help prevent the chicken from sticking to the bag and also help the spices and seasonings stick to the chicken. So it’s a win-win situation.
Cook them low and slow
The main thing to keep in mind when cooking sous vide is that you’re going to be cooking at lower temperatures than you may be used to and for much longer. There’s no such thing as a quick meal with a sous vide machine. The flavor and juiciness take a while to develop, and you’ll want to make sure your chicken thighs cook all the way through. Think of it this way: Instead of roasting some chicken thighs in an oven at a temperature range of between 375 to 400 F for 30 to 40 minutes, you’re probably going to be using your sous vide at 150 to 170 F for between one and four hours. If you’re able to master the art of patience, you can make the most of your sous vide machine.
For the most stress-free and effortless sous vide cooking, be sure to plan ahead. Get your chicken thighs started in the morning if you want them for lunch, or started in the afternoon if you want them for dinner. While there are different timings and temperatures that work (and it also depends on the size of your chicken pieces), I’ve found that using medium-sized, bone-in chicken thighs, I get consistently delicious results at 165 Fahrenheit for three hours. You’ll have succulent and tender chicken, perfect for a main course or for use in a chicken salad or sandwich.
Sear your skin afterward
If you opt to cook your chicken thighs with the skin on (which I argue that you should), you have to sear them in a pan afterward. This is because once you’re done cooking your thighs in your sous vide, you’ll be left with soft, jelly-like skin, which is not appetizing for everyone. There’s nothing better than crispy chicken skin, so this step is definitely worth the effort.
However, if you sear your chicken skin straight out of the sous vide bag, you’ll risk overcooking it completely. That’s why many food professionals recommend placing the sous vide straight into an ice bath after it’s finished cooking. This not only makes the bag safer to handle, but it helps to stop the cooking and cools the meat enough that when you place it in a hot pan to sear the skin, it will brown effectively and not overcook. The residual heat from the pan will warm the rest of the thigh so that it’s at a pleasant temperature for eating.
First, remember to dry your chicken skin completely after taking it out of the bag. If you skip this step, your skin will be full of moisture and will be soggy rather than crispy. Pat it dry with a paper towel, and then place it skin side down in hot oil in a pan. On medium heat, I’ve found that the skin browns beautifully after about five minutes, after which I flip it over for another two minutes to warm up the rest of the chicken.


