
If you’re a transplant who misses New York City’s incredible cannoli spots or you simply love the treat, there’s a decent chance you’ve pondered making the dessert pastry from the comfort of your own kitchen. Then again, it’s one of those elusive treats that often escapes the notice of home bakers, and understandably so. It’s more labor-intensive than your average dessert bake, and, in truth, isn’t the easiest to perfect. Fortunately, the learning curve with cannoli is actually pretty slight, and making them at home is absolutely feasible.
Now, the best way to learn how to make cannoli is to get hands-on practice in an Italian bakery — which is what I did. Over the course of a little less than a year, I churned out hundreds of display-ready cannoli that were delicious to boot. While not all of them were perfect, I acquired some tips along the way — many of which can alleviate the challenges faced by home bakers when trying to make bakery-worthy cannoli.
Though it’ll take some practice — and you’ll need to invest in a couple pieces of equipment you may not already have (like a circular cookie cutter, heavy-duty rolling pin, and cannoli rods) — it’ll be worth it to hear guests ooh and aah over your pastry at a dinner party. Here are 11 tips for making bakery-worthy cannoli.
Don’t skip the wine
If you look at a few legitimate cannoli recipes, you’ll probably find yourself questioning: Why do they all include wine? Well, wine is a key ingredient in cannoli dough because it inhibits gluten development, and skipping it will basically sabotage your whole batch.
Since cannoli dough gets kneaded slightly, using wine as the liquid keeps it from getting too stiff, which then lets you roll it as thin as possible. Beyond that, alcohol cooks out faster than water, and its evaporation creates the blistered, crispy surface of your cannoli during the frying process.
In short, wine is a crucial ingredient to both the flavor and structure of good cannoli, and is arguably one of the most important ingredients in a cannoli recipe. Plus, the wine doesn’t need to be anything high-end, as a simple cooking wine will suffice. It’s not used primarily for flavor (though it does contribute some), after all, but helps create the signature bubbles that great cannoli are known for.
Roll your dough paper thin
Wine isn’t the only thing responsible for the enviable crackle of a well-baked cannoli shell. Since you’re unlikely to ever achieve a crisp exterior if the dough you’re frying is too thick, you’ll want to get it as thin as possible when rolling out your cannoli dough.
Now, to be clear, you don’t want it to be windowpane-thin — we’re not developing gluten in this recipe, after all — but you should be able to see some slight light if you hold the discs in front of a window. When using a rolling pin, it’ll take a couple passes, letting the dough rest between each. Roll it as thin as you can and cover it with plastic wrap (so it doesn’t dry out) while resting it for a few minutes, then continue rolling it. A pasta machine will come in handy here, as rolling out cannoli dough is a similar process to rolling out pasta dough.
Once your dough is thin enough, use a round cutter to cut it into circles. Ball the scraps together, as they can be rolled out one more time. While any remaining dough is often tossed, you can also repurpose your dough scraps however your creative brain dictates.
Grease your cannoli rods
If I was forced to severely pair down this list of cannoli tips, this one would absolutely make the cut. After all, failing to grease your cannoli rods can have disastrous consequences — namely, the dough might stick to the rods and promptly break when you try to take off the fried shells.
Now, I haven’t found the need to be super thorough during the rod-greasing process, so don’t worry about ensuring an even coating of oil is on the rods. Instead, I make sure to spray a generous amount of cooking spray over my container of cannoli rods, then use my hands to mix them around. This ensures each rod gets a decent enough coating to prevent the shells from sticking during the frying process.
While it’s totally possible to get a stuck shell off of its rod, trust me: It’s still a headache. With that in mind, being able to easily slide the shells off is a luxury not to be under-appreciated when aiming for bakery-worthy cannoli.
Seal the edges well
Another thing that can instantly thwart your cannoli-making efforts is turning out taco-shaped shells. Because the dough bubbles up and expands while being fried, forming a good seal around the rod is crucial. In fact, I’ve seen far too many hastily-sealed cannoli open up during the frying process, which results in an open-sided shell rather than a tubular one. While this often means a free (albeit silly) cannoli for the baking crew in a commercial setting, it’s less than ideal for the home baker prepping for a party.
Most recipes use egg whites to seal the cannoli shell ends together once they’ve been wrapped around the rod (one of the more creative uses for egg whites, in my opinion). I do this, too, flattening out the sealed edge by wiping it with egg white and using a good amount of pressure. Don’t smoosh the shell, as you want the line of the seal to be barely visible. When done correctly, this yields gorgeous and uniform shells that actually hold their shape once fried.
Don’t wrap them too tightly
A key learning moment for me came when I was overzealous while wrapping cannoli one morning. Though I gave them a tight wrap and an excellent seal before frying, my morning baker brain didn’t anticipate the unfortunate consequences. All of the fried shells were wrapped so tight that they either cracked or were impossible to pull off the rods. Thankfully, I bore the burden of this mistake — meaning you hopefully don’t have to.
Now, I’m not implying your cannoli dough needs to be so loose that it falls off the rods. But you’ll want to leave a bit of space when wrapping it around the rods to preserve the shells’ integrity, and make it easier to remove the final product. With that in mind, when holding the rod horizontally, a well-wrapped cannoli shell should hang down very slightly from the bottom of the rod. Be sure not to overlook this step, especially if you’re not planning to have extra cannoli shells on hand in case of incidentals.
Check the temperature of your frying oil
Many valuable tools contribute to the creation of a perfect cannoli. Everything from the rolling pin to the rods to a decent piping tip play a key role in the production process. Yet in any relatively complex bake, there’s a tool that often falls under the radar. However, I’d argue it’s necessary for cannoli-making to check the temperature of the frying oil: A digital thermometer.
Frying these thin shells can be a finnicky process (which I’ll elaborate on in later tips), and improperly heated oil will throw it off from the start. Oil that’s too cool won’t bubble up in the fryer, while overheated oil will easily render your shells a helpless, charred mess. We kept the fryer at about 375 degrees Fahrenheit for large-batch frying in a bakery, but I’d recommend sticking closer to 350 degrees Fahrenheit when frying at home.
Given the need for a precise temperature, a handy digital thermometer will make it easy to determine when you’ve reached that temperature window. You’ll also want to check the oil’s temp after each batch of frying, and wait until it’s back in range before starting your next batch.
Keep the cannoli shells fully submerged in oil
Alas, you can’t set your shells in the fryer and walk away for a couple minutes. Cannoli shells float in the oil, and unless you keep them fully submerged or continually rotate them (which is a harder task), they’ll fry unevenly. Since that ideal golden exterior is something that makes cannoli so stunning, you don’t want an uneven bake. It’s unsightly, after all, rendering your finished product much less impressive than it would be otherwise.
When you’re only frying a few shells at a time, you can use a stainless steel spoon on a spatula to keep the shells under the oil. Of course, if you’re willing to go on the hunt for a round fryer screen with a handle, you can also use that to keep the shells submerged. In that case, you’ll simply put it on top of the shells in the oil rather than using it to lower shells into the pot. Feel free to be innovative here, as well, especially if you’ll be making cannoli on a regular basis.
Stop frying while they’re light in color
Another tip that would almost certainly make my hypothetical pared-down list of cannoli tips is this one: Removing your cannoli from the fryer before they’re as dark as you want them. Since it requires a bit of trial and error to find the best cooking time for your shells, I recommend frying a single cannoli to start each time you whip up some cannoli. This way, you’ll know how long it takes to fry the shells, then adjust from there.
Your shells should only take a minute or two, so using a timer is crucial; even just a few seconds can make a big difference between perfect and overcooked shells. The shells will continue to darken on the rods after you remove them from oil, after all, so be sure to pull them a little before you think they should be done before letting them rest on a wire rack. Once they’ve cooled down, they should have reached that ideal golden-brown color.
Use a blend of ricotta and mascarpone for the filling
Most cannoli recipes you find online only call for ricotta cheese, which will lead to a light, delicate, and fluffy filling that’s fine for any cannoli enthusiast. However, if you want to add some depth and richness to your cannoli filling, blending some mascarpone in with the ricotta is a great idea. After all, since mascarpone yields a richer cheesecake, it only makes sense that it can bring decadence to your homemade cannoli, as well.
You’ll probably have to play around with the ricotta and mascarpone ratios until you find your ideal texture. To combine them, beat the two together in a stand mixer until the mixture is smooth and subtly fluffy; it should be stiff enough that it’s not runny. Additionally, I don’t find it necessary to fully drain the ricotta during this process, as a scant amount of excess moisture helps temper the thickness of the mascarpone a bit.
Pipe the filling inside the shells
Most occasional home bakers have likely used the classic piping bag shortcut in the past, where you cut the corner of a plastic bag to make do in a pinch. Now, if you’re absolutely out of other options, you can certainly use that method to fill your cannoli shells. However, it won’t bring about the cutest results for your crowd. In fact, for bakery-worthy cannoli, you’ll want to make a small investment in a piping bag and large piping tips.
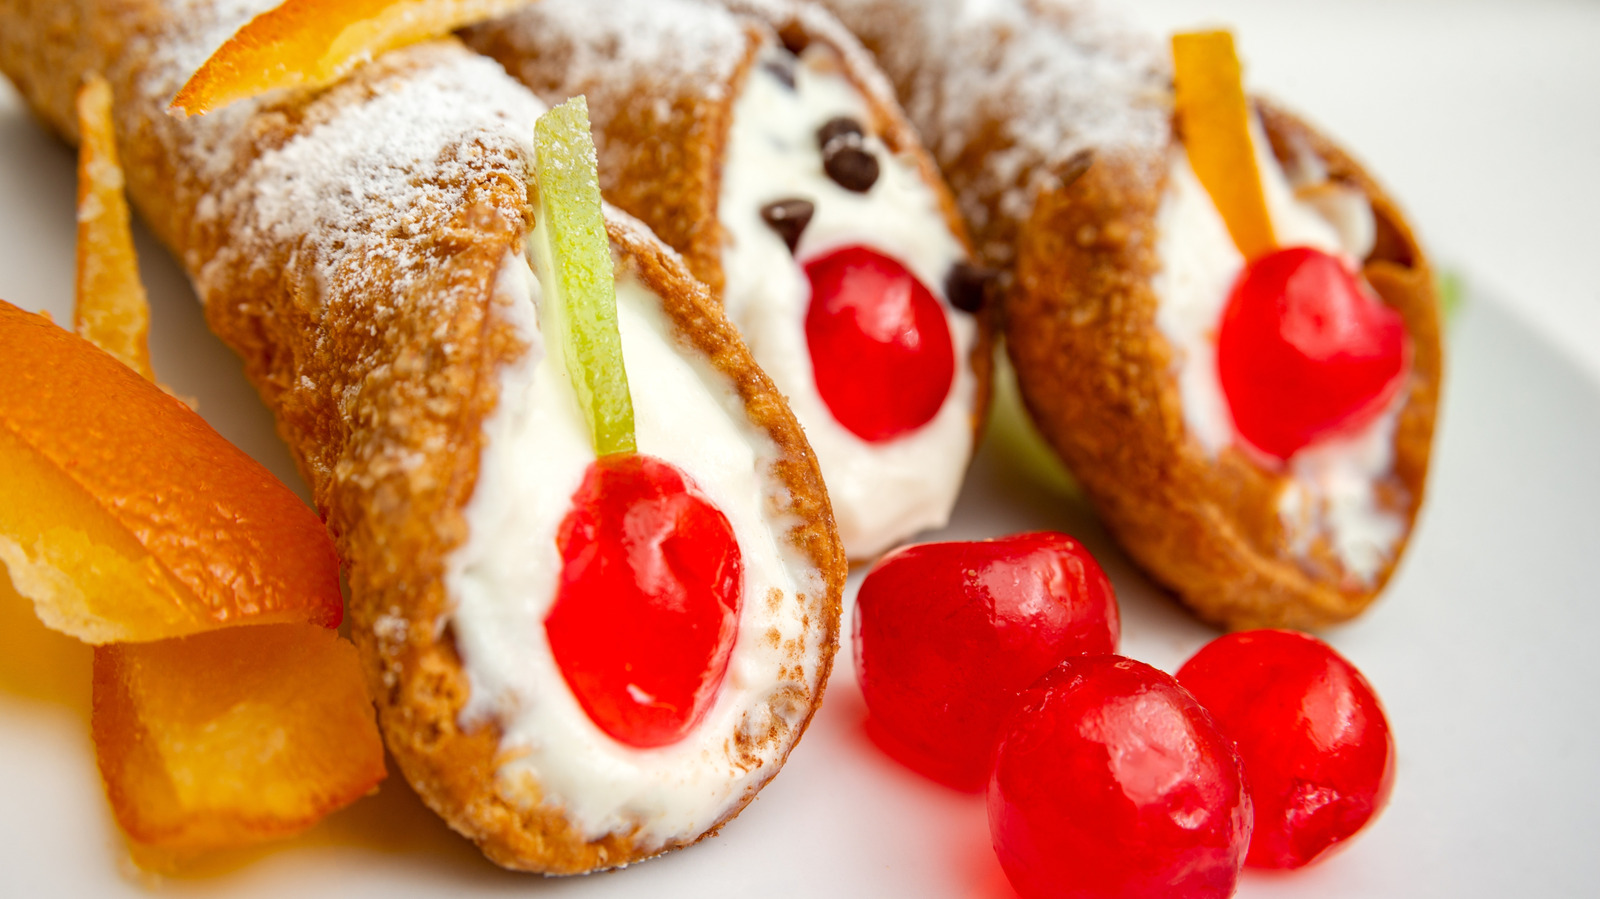
Pipe the filling into the shell at both ends, starting from the middle and going outward on each side. Don’t be skimpy with your cannoli filling, either; it should be thick enough that you can extend it just past the edge of the shell without it falling apart. Additionally, I personally prefer an open star tip. When filling cannoli with an open star tip, the result will be a sleek, subtly-ridged, and slightly bulging filling that’s just asking to be dipped in any variety of toppings.
Don’t be afraid to get innovative!
To be sure, this particular tip is best left for when you’ve gotten the basics of cannoli-making down, but it bears mention nonetheless: Don’t be afraid to have fun when making cannoli! The base elements are neutral enough to be customizable, and you should play with spices and seasonings as you see fit.
For instance, you can make a classic cannoli and dip them in your favorite cereal pieces, or try your hand at the fan-favorite pistachio cannoli. You can also impart additional flavors to your filling, and even fill your cannoli with a different concoction altogether (as long as it’s relatively the same texture).
You can always drizzle chocolate or caramel on top of the shells, add natural food dyes to create a theme for your cannoli, or mix in other ingredients into your filling (like chocolate chips or chopped almonds). You’re only limited by your imagination here, so let it run wild — and you just may come up with your new favorite dessert.


