
If you haven’t heard of chicken fried steak before, you are seriously missing out. For those who know, it’s one of the most comforting meals out there. This Southern classic is fatty, meaty, salty, and drenched in delicious, creamy gravy. It’s not a light meal by any means, but it’s sure to hit the spot when you’re hungry for something incredibly satisfying. Anyone who’s had it before will likely crave it every now and then, and those who live somewhere you can easily access a serving of it are lucky. For the rest of us, we have to learn to make our own. Fortunately, it’s not as difficult as it seems, and with a bit of know-how, you can make your own incredible diner-style chicken fried steak at home in no time.
For those unfamiliar with it, chicken fried steak isn’t actually made with chicken as the name suggests. While made with beef, it’s coated in a crunchy fried shell, and prepared in a similar way to fried chicken — thus earning its name. As a culinary-trained recipe developer and food business owner, I’ve made chicken fried steaks for clients numerous times. Often, I take the opportunity to make a little extra for my family too, since they can’t get enough of it. It’s a winner with kids and adults alike, and it’s sure to be a hit at your next potluck or family gathering. Here are some tips for making the ultimate chicken fried steak.
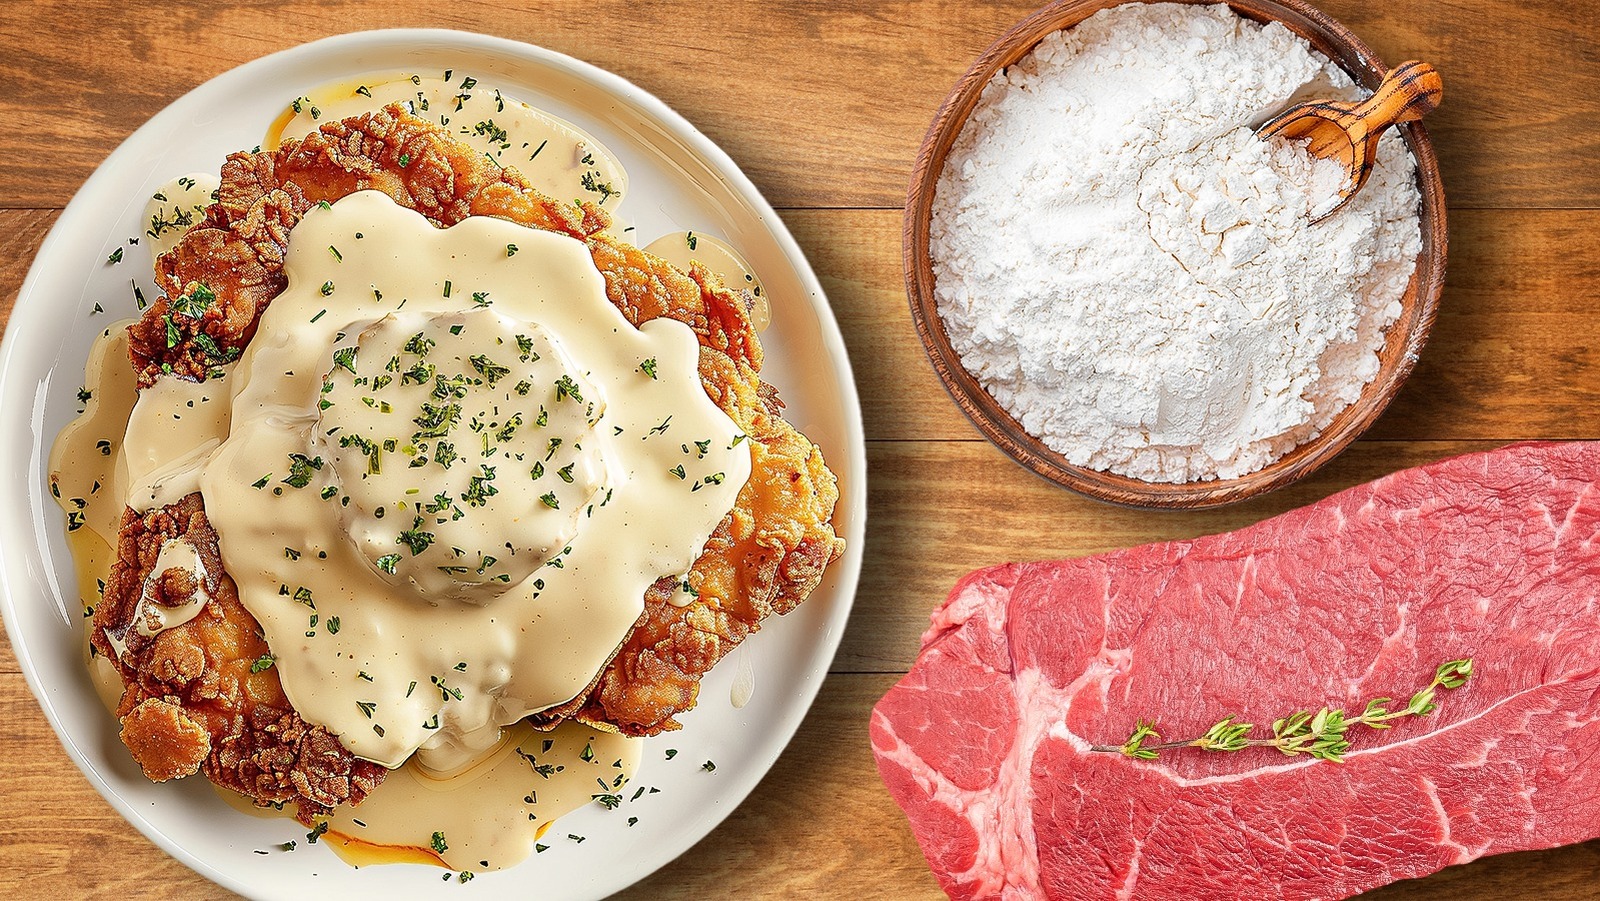
Use the right cut of meat
The first step to making a good chicken fried steak is to get the right cut of beef. Now, there’s no point in buying a fancy cut of beef to deep fry. In fact, that kind of goes against what chicken fried steak was created to do, which was to make cheaper cuts of meat more palatable. The genius lies in the fact that it takes tougher, less flavorful cuts of meat and transforms them into something delicious. Still, you want the meat to be tender enough so it’s going to be easy to eat.
If you shop from a butcher, you can always tell them what you’re cooking and they’ll give you the right cut, and even help manually tenderize it for you. Usually, the absolute best cut to use is cube steak. Cube steak isn’t really the name of the cut, but more the method of preparation of the meat, which has been cut thinner than regular steaks and been through a machine tenderization. This creates little cross cuts all over the meat, making it easier to chew when you eat it.
If you can’t find cube steak, a great cut to use is top sirloin. (Sometimes cube steak is made from top sirloin anyway). Top sirloin is a leaner, yet still relatively tender cut of beef that is perfect for chicken fried steak. Whichever cut you use, you want your steaks to be relatively thin. If your steaks are too thick, then you’ve got to put your muscles to work and get pounding. Using a meat mallet or pounder, give your meat a bash. This has the added benefit of tenderizing the meat, if it hasn’t been already. In my experience, a nice thickness for each steak is about a quarter of an inch.
Use both flour and a wet batter
One of the best parts of eating chicken fried steak is that golden, craggy crust. It’s equal parts crunchy and soft, and makes every bite a textural experience. So it’s not the best idea to take any shortcuts with your batter. I find that using both a dry and wet batter creates the perfect exterior for your steaks. The dry batter is your flour component and the wet batter can vary, but usually involves using eggs, milk, or buttermilk.
As with fried chicken and what makes for the best coating, there are debates around which type of batter to use. If you only use a dry flour batter, your steaks will be covered in a thin and crispy breading — but it won’t have that thick, crunchy, and fluffy shell that chicken fried steak is known for. But using a wet batter alone won’t get you any “folds” or that texture variation that goes between crispy and crunchy, to pillowy. That’s why it’s best to use both a dry and wet batter to get them working together to create the ultimate crust.
Season every component (both dry and wet ingredients)
Part of where a lot of people go wrong is forgetting seasonings. You can have a beautifully cooked, crunchy fried steak, but if you didn’t season it properly, it’s going to be bland and a waste of all your effort. Don’t use just plain flour without adding any seasonings. This is where you need to add salt and any spices you want to use. A sprinkle of black pepper, cayenne pepper, paprika, chicken seasoning, or any spice blends you like the taste of will work great.
But don’t stop at the flour. Your wet batter is also going to be covering your meat, so make sure to include those same seasonings in there too. Just whisk them in so that they’re evenly combined. Finally, season your beef before you coat it in the batter. Many people forget to do this step, because they think the batter is the only part that needs to be seasoned. The meat itself has to taste good, and if you’re only relying on the batter to give you flavor, your chicken fried steak can end up being lacklustre. For even more flavor, season your meat the night before you cook it up. It will help the salt and spice permeate into the meat, rather than just sit on the outside.
Reserve some seasoned flour for the gravy
Chicken fried steak would be incomplete without the thick, creamy gravy that you get to drown it in. Usually you make the gravy just after frying your steaks, using the (now seasoned) oil you’ve used to fry them in. This way, the flavor of your steaks is infused in the very beginning of making your gravy. There is an additional step you can take to reinforce this flavor and make your gravy even tastier at the end. If you plan ahead a tiny bit, reserve some of your seasoned flour to use to make your gravy.
Using the same seasoned flour in your gravy as you have for your dry batter is not only a great idea for doubling up on flavor, but it also creates a little cheat code for later. You save a bit of time in not having to pull out all your seasonings again for your gravy, and you’ve already portioned out your flour to throw in. Since your steaks will be cooked and ready to eat, you’ll be thankful for any little shortcuts in making the gravy, before your steaks get cold. So practice a little foreplanning when you’re putting your flour together and keep some of it aside for later. You may not even have to plan to make extra, as usually you have leftover flour after you’ve dredged all your steaks. Use it in the gravy instead of discarding it and you’re even preventing some food waste.
Don’t forget the buttermilk
Buttermilk is one of those ingredients that can enhance so many foods. I’ve often found that every time someone has a “secret” ingredient in a really delicious baked good or some delicious fried chicken, the ingredient somehow always ends up being buttermilk. After trying it in my chicken fried steak batter, I can confidently report that it’s also the case here. Buttermilk just makes everything a little juicier, richer, and gives the tiniest little tang which makes the crust incredibly moreish.
So where do you add in the buttermilk? Simply mix it into your wet batter with your eggs and milk. You can use buttermilk instead of milk, or do half milk, half buttermilk, and still get a great result. If you don’t often keep buttermilk in your fridge, it’s worth getting some just for making chicken fried steak. I’m all for using what you already have, but when it comes to buttermilk, it’s worth the trip to the store. Plus, there are numerous other ways you can use leftover buttermilk.
Use a large, flat dish for the flour dredging
When you’re at the stage of dredging your steaks in your flour, you want to give yourself enough space to work with. It’s not a difficult part by any means, but it can be a bit delicate, since you want each part of the steak to be evenly covered with both your dry and wet batter. With the dry batter especially (the wet batter is more forgiving as much of it will run off anyway), this can be ensured by using a large and flat dish for it. The size of your dish doesn’t have to be massive, but large enough that each steak can easily fit in it without needing to move it around.
This tip might seem like a no-brainer, but depending on the size of your steaks, this might not always be as obvious. With really large steaks, especially if you’ve pounded them out, you don’t want to fold them in any way to fit the flouring station. This can make your flour fall off in parts, or make an uneven layer where some parts are too thick. Additionally, as you’ll be transferring from one batter dish to another, it can also make the process clunkier and messier if your dish is smaller than your steaks. So, save yourself the hassle and get out a large plate, or even a baking sheet, to dredge your steaks in.
Do a double coating of flour
Another tip that helps you get that sought-after golden shell is to double-dip your steaks in the flour. If you’ve made Southern fried chicken before, this will be a really intuitive step. But for first timers attempting to make this fried, battered meal, it’s an important note to take into account. When you’re following a recipe online, you can easily miss this step if you’re skimming through the instructions. So, what does it mean to double dip your steaks? Well, you’ve got two batters, but it’s a three-step process.
Your first step is to dredge or coat your steak in the dry batter — your seasoned flour. You can use your hands to spread the flour all over it, or simply drop it in the flour on both sides. Then, you’ve got to dip it into the wet batter, making both sides get covered in it. Lastly, you’ve got to take your steak and dredge it in the flour again. Now you’ve managed to get a double coating of flour that will make for extra crunch once fried.
Let the steaks air dry before you cook them
Once you’ve fully coated all your steaks in batter, they’re almost ready to be fried. You could go straight into the frying oil at this point and get a decent result, but to get the best result possible, you need to let them rest a little bit. If you’re used to letting your steaks rest after you’ve cooked them, you may find it strange that in this case, they’ve got to rest before cooking. There’s a slightly different reason for pausing in this case. The more your batter air dries on your steaks, the crispier they will be. The flour will be damp from the wet batter, and if it’s too wet, it can make your crust soggy. Letting your steaks dry out a little before cooking will prevent that.
This also gives everything time to settle and helps the coating adhere to the meat, so that you’re not having pieces of batter come off in the oil. This not only wastes some of your batter, but leaves some empty patches on your steak, which nobody wants. Don’t worry, you don’t need to wait for ages, as in my experience, even just 10 to 15 minutes does the trick. The best way to facilitate good air flow on your steaks is to rest them on a wire cooling rack.
Make sure the oil is hot enough before frying
Another factor that can affect the sogginess or crunch of your batter is oil that’s not hot enough. Frying your steaks before the oil is sizzling will mean that they’re going to be sitting in there for much longer, and in doing so, they’ll be absorbing more oil. Hotter oil means the steaks cook and get brown quicker, without enough time for excess oil to absorb. At the same time, if your oil is way too hot, your steaks can easily burn, or brown on the outside before cooking through on the inside. You can test the oil’s readiness by dropping in a tiny piece of batter. If it slowly bubbles, it’s not hot enough. But if it rapidly bubbles and sizzles, then it’s ready to go. Careful, if the oil is too hot, you’ll notice that it furiously sputters out oil. If it’s doing that, turn the heat down slightly and give it some time for the temperature to settle before testing it again.
If you’re shallow frying, a good tip is to spoon some of the hot oil over the uncooked top side of your steaks before flipping them. This will lightly cook and slightly firm up the uncooked batter, which will ultimately help it not break up while flipping.
Don’t overcrowd your oil — fry them in batches
As your steak is busy frying in the oil, you might be tempted to throw in many to fry at the same time. Sure, this might save you some time, but there’s a risk of overcrowding your oil, which can result in uneven cooking, which is the last thing you want after all the effort you put in to delicately prepare them. Plus, if you throw in too many at once, the oil could splatter and burn you — believe me, I can say from making that mistake that it’s super painful.
You’re also more likely to lose control of your steaks if you’re frying several at a time. You could forget which has been cooking longer or which has already been flipped. That’s why I always advise frying your steaks one at a time, or in batches of two at the most. That way, you can manage them with ease, and get each one absolutely perfect.
Fry until you get the golden brown color you want
People often ask me how long they should fry their steaks, and it’s a really difficult one to answer. Even when trying to write out the recipe, I’m hesitant to put in an exact number of minutes. The time it takes your steaks to fry depends on the size of the steaks, the thickness of your batter, the size of your skillet/pot, and the temperature of the oil. There are too many factors that determine it to say a fixed number. Instead, use your eyes and your intuition. The steaks are done when they look done to you. Basically, you want to fry them until they are the level of golden brown that is appetizing to you.
Don’t worry, you don’t need to worry too much about overcooking it. If your oil is warm enough, it can be a pretty forgiving process. Your steaks are meant to be cooked until “well done” anyway, and your batter will get crispy and brown pretty quickly.
Don’t let the gravy be an afterthought
With all your attention going to the steaks themselves, don’t forget that the gravy makes a big part of the dish too. Yes, it’s the final step of making chicken fried steak, but don’t let it be a last-minute afterthought. And, resist the urge to buy packet gravy. Packet gravy doesn’t match up to a freshly fried batch of chicken fried steak, and making a gravy from scratch is a lot easier than it sounds.
You’ve already got two of the main ingredients ready to make it. The oil or whatever fat you’ve used to fry your steaks, and the seasoned flour you used as your dry batter. You can even use the same skillet. Pour out all the oil except for a little bit that you can use to start your gravy with. Throw in the flour and mix it together until it forms a paste. Then gradually pour in some milk, a little at a time, whisking as you go to get everything mixed into a uniform liquid. Your sauce will be ready as soon as it reaches your desired level of thickness. If it’s too thick, add some more milk, and if it’s too runny, let it cook down a little longer. Taste it to see if it needs any more seasoning, and top it up with salt and pepper as needed. Voilà, you’ve made a delicious homemade gravy to serve on your chicken fried steaks.


