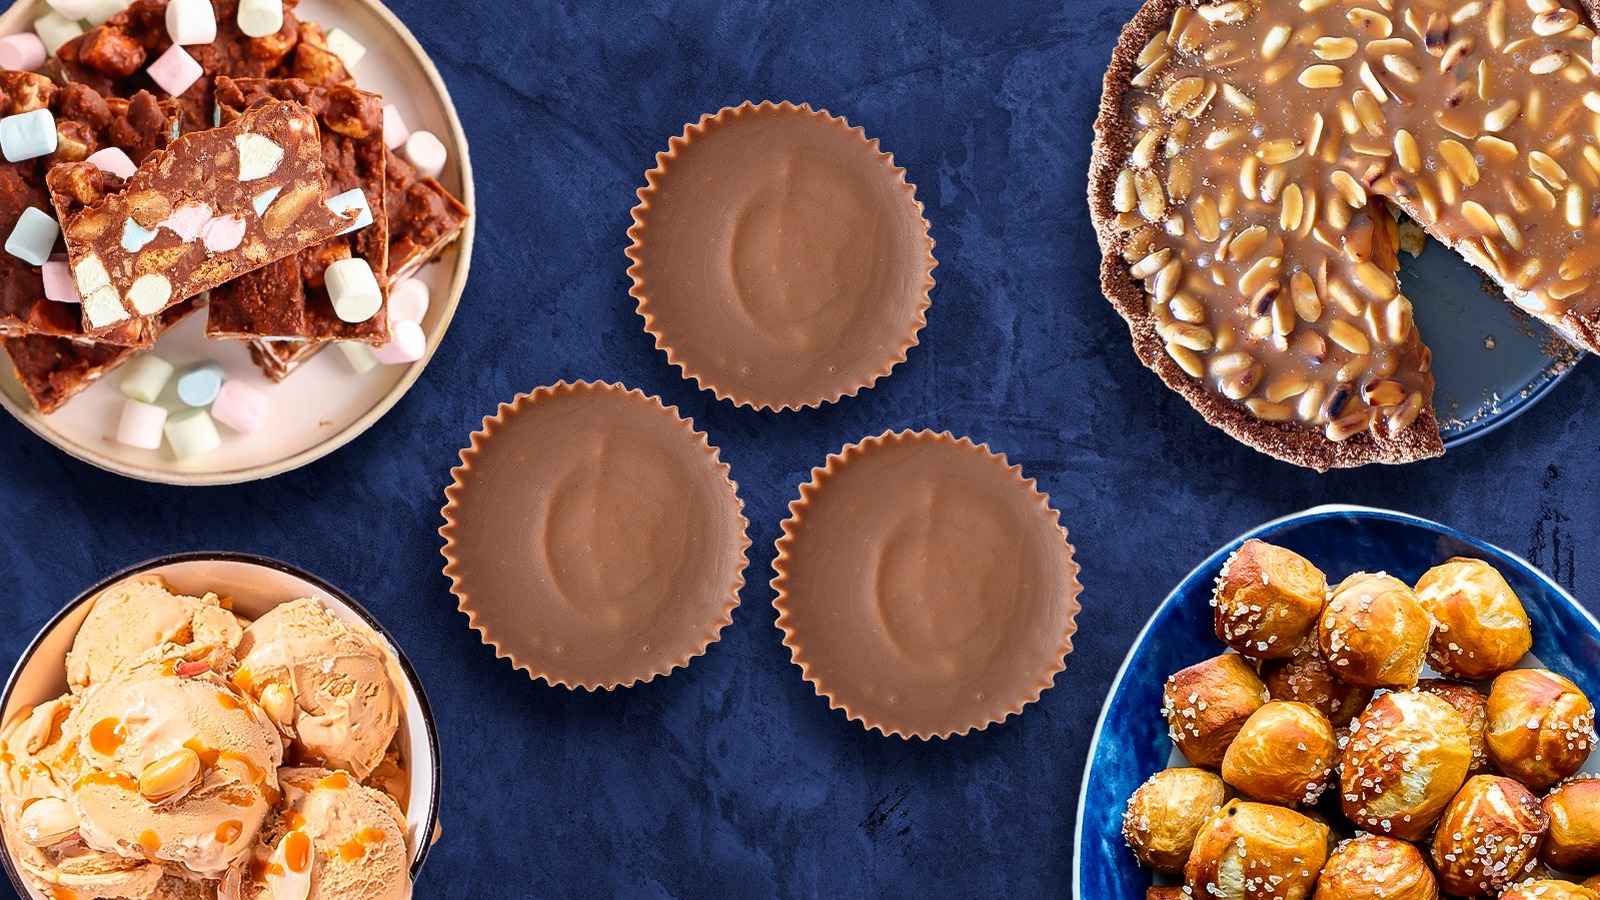
Peanut butter cups are a nostalgic treat for many. The combination of a smooth, salty peanut filling and sweet, creamy chocolate shell is a firm favorite for people of all ages. It’s perfect for snacking or rounding off a meal with something sweet, but eating these little beauties straight from the packet certainly isn’t the only way to indulge in their nutty goodness. Peanut butter cups can also be incorporated into a wide array of homemade desserts.
From crowd-pleasing bakes and simple snacks to decadent showstoppers, there are heaps of creative ways to put these bite-sized treats to good use. Whether you’re stirring them into a mixture, scattering them on top as a flavorful finishing touch, or even blitzing them into a drink, peanut butter cups are sure to give your homemade creations a delicious upgrade. Most of these recipes feature miniature peanut butter cups, but for the most part, you could absolutely chop the regular-sized versions into smaller pieces if that’s easier. So, if you have one too many packets of Reese’s (or another brand) lying around at home, take some inspiration from the suggestions below and discover how you can transform these already irresistible goodies into something even more epic.
Bake them into cookies
Who doesn’t love a warm, perfectly chewy-crisp cookie? Homemade cookies are a fuss-free option when you’re craving something sweet, and one way to make them taste even more incredible is with the addition of peanut butter cups. By pressing miniature cups into the gooey centers of freshly baked cookies, you can give them a mouth-watering upgrade, adding plenty of nutty, chocolatey flavor to every bite.
To start, mix up a simple peanut butter cookie dough with the usual suspects, like butter, sugar, peanut butter, eggs, vanilla extract, all-purpose flour, baking soda, and salt. Once you have a smooth dough, pop it into the fridge for about an hour to firm up. When it’s chilled, take small handfuls of the cookie dough and roll them into balls and bake them, but don’t overdo it. They should still be nice and soft when fresh out of the oven. Now, it’s time for the all-important finishing touch: Take a peanut butter cup and press it into the center of each cookie. If you prefer a melty texture, just leave the cookies to cool slightly at room temp before eating. Or pop the cookies into the freezer for 10 minutes or so to set the peanut butter cups fully.
Pair them with cheesecake
No-bake cheesecakes have to be one of the most versatile desserts, with endless ways to flavor and decorate them. Introduce peanut butter cups into the mix, and you’ll bring texture and sweetness to your cheesecake, all while amping up the visual appeal. You can add peanut butter cups both into the cheesecake filling mixture itself and scatter them on the surface before serving.
The nutty, chocolatey flavors work exceptionally well with an Oreo crust, but you could go for a classic graham cracker one if preferred. Once this has been pressed into the bottom of a springform pan, whisk up the peanut filling — a mixture of cream cheese, vanilla extract, icing sugar, peanut butter, and double cream. Now, we can incorporate the peanut butter cups. Roughly chop and fold them, then spoon the mixture on top of the chilled crust. After around six hours in the fridge, the cheesecake should be set. When it comes to decoration, arranging another generous handful of peanut butter cups on top of the cheesecake is a must. You could also add some swirls of whipped cream, a drizzle of melted peanut butter, or a layer of chocolate ganache if desired.
Add them to cupcakes
Perhaps you’ve mastered the classic chocolate cupcake, but have you tried stuffing your cupcakes with peanut butter cups? Yes, this is as amazing as it sounds, and it’s remarkably easy to pull off. Just pop a peanut butter cup into each batter-filled cupcake hole before baking, and when you bite into that tender chocolate sponge, you’ll reveal a deliciously peanutty center.
Step one is mixing up a chocolate cupcake batter. Once the ingredients have been whisked together in one bowl, transfer the mixture to a lined cupcake pan, filling each hole about two-thirds of the way before. Grab your mini peanut butter cups and push one into each cupcake hole, fully submerging each one in the batter. Bake the cupcakes for about 15 minutes, until risen and fluffy, then leave to cool before decorating.
The perfect way to top these cupcakes is with a creamy peanut butter frosting made with a combination of softened butter, powdered sugar, peanut butter, salt, heavy cream, and vanilla extract. Just whip everything up until wonderfully fluffy, then spread or pipe swirls of the frosting onto each cooled cupcake. The cupcakes will look every bit more impressive with another peanut butter cup or two placed atop the creamy frosting.
Give your brownies a nutty upgrade
Gooey chocolate brownies provide the perfect base for stuffing with other complementary ingredients. Whether you’re after something fruity, tangy, or nutty, there are so many delicious add-ins to choose from. And something we’re totally on board with is incorporating peanut butter cups into that decadent batter.
We recommend using our ultimate fudgy brownie recipe as a starting point here. Once you’ve browned the butter and mixed through the sugar, eggs, and vanilla extract, you’ll fold in cocoa powder and flour until just combined. With the basic batter prepped, now’s the time to give it a nutty upgrade. Fold through some chopped peanut butter cups, plus a handful of chocolate chips if desired, and transfer the mixture to a parchment-lined square baking pan. To really maximize the peanut flavor, you could also swirl melted peanut butter on top of the brownie batter before baking.
After around 30 minutes in the oven, the brownies should be cooked through but still be gorgeously gooey in the middle. Make sure to leave them to cool completely before slicing, and feel free to top everything off with some extra peanut butter cups. These brownies would taste particularly fantastic served with a scoop of peanut butter ice cream.
Make peanut butter cup croissants
How can you make a golden, flaky croissant even tastier? With the help of peanut butter cups, of course! Stuff these little morsels into buttery croissant dough, and you’ll create an irresistible layer of chocolatey, nutty goodness that’ll take your pastry to the next level. While you could make the croissant dough from scratch, another more convenient option is to use store-bought crescent rolls. Simply unroll the dough, place a mini or chopped peanut butter cup onto each section, and roll the triangles up to create the crescent shapes. Then, give the edges a quick pinch to keep the peanut butter cup securely sealed within the dough.
Transfer the rolls to a baking sheet and bake in a preheated oven until beautifully puffed up and golden brown. Pre-baked, store-bought croissants can work well here, too. Just slice each croissant down the middle, scatter chopped peanut butter cups onto one half, and top with the other half. These can then be warmed in the oven for a few minutes until the filling has melted down and the pastry is crisp.
Whip up a decadent tart
If you’re looking for an impressive show-stopper to make for your next gathering or celebration, a chocolate peanut butter tart is a brilliant option. This recipe is super easy to whip up but looks and feels a little fancy, and peanut butter cups can provide a wonderful textural contrast to the smooth filling. An Oreo or graham cracker crust is a great place to start.
Press the buttery crumb mixture into the base of a fluted tart pan and place it in the oven for about 15 minutes. While it cools, prep the filling. Beat softened butter in a stand mixer until smooth, then add powdered sugar, vanilla extract, and salt, and beat to combine before mixing through creamy peanut butter. If you’d like to incorporate chopped peanut butter cups into the filling element of the tart, simply fold them through at this point. Otherwise, you can reserve them for topping the finished tart.
Once you’ve spread the filling evenly into the tart base, melt chocolate and peanut butter together and pour this on top. Then, scatter plenty of peanut butter cups over the top. These can be whole or chopped, miniature or regular-sized. You might prefer to pile them up in the center of the tart or arrange them into a neat border around the edge. Go ahead and get creative here. Finally, chill the tart for at least four hours, and it’s ready to enjoy.
Add them to rocky road bars
The beauty of rocky road is how open to customization each recipe can be. This no-bake treat is popular in Britain and Australia and typically features crushed digestive biscuits (which are similar to graham crackers), butter, chocolate, golden syrup, and mini marshmallows. However, there’s ample opportunity to throw in a range of other add-ins, such as chopped nuts, dried fruits, honeycomb pieces, or popcorn. And are you thinking what we’re thinking? Yes, peanut butter cups would make a fantastic addition.
To create a mouth-watering slab of peanut butter cup rocky road, add roughly crushed biscuits/crackers to a large mixing bowl and stir in both mini marshmallows and mini peanut butter cups. Next, melt butter, golden syrup, and finely chopped chocolate together in a pan. For extra flavor, you could also stir in a dollop of creamy peanut butter. Let this mixture cool a little, then pour it over the biscuits and other add-ins and stir everything together. Now, all that’s left to do is press the rocky road mixture into a lined square baking pan, top it with extra peanut butter cups, and let it chill in the fridge for about two hours before slicing into squares.
Stir them through ice cream
The sweet, nutty bite of peanut butter cups makes them an amazing accompaniment to rich, creamy ice cream. And, while you can absolutely keep things simple and scatter the cups atop a bowlful of your favorite frozen treat, why not take things a step further? Peanut butter cups are super easy to incorporate into a batch of homemade ice cream, whether you have an ice cream maker or not.
Making a basic no-churn ice cream actually requires just three ingredients — condensed milk, heavy cream, and vanilla extract. All you’ll need to do is beat these together with a handheld whisk until nice and thick. To introduce peanut butter cups into the mix, just fold the mini cups (chopped or whole) into the whipped ice cream mixture, then scoop everything into a loaf pan. Drizzling some melted peanut butter on top of the ice cream would be a great final touch, and there’s always room to garnish with extra peanut butter cups, too. Then, cover the pan with plastic wrap and pop it in the freezer until firm.
If you have an ice cream maker, you can make the base with a more traditional combination of ingredients, such as egg yolks, sugar, whole milk, and heavy cream. You could throw in some creamy peanut butter as well. With this method, the peanut butter cups can be added after the churning stage, but before you transfer everything to a loaf pan for the final freeze.
Blitz them into a milkshake
This one is a must-try for fans of indulgent, dessert-like milkshakes. We aren’t just using peanut butter cups as a topping here, we’re blitzing them up into the milkshake itself. This gives the drink the most incredible richness and just the right balance of chocolate and peanut. First, add vanilla ice cream, milk, and peanut butter to a blender and blitz to combine. Then, add a handful of chopped peanut butter cups and blend again until smooth. Pour the gloriously thick mixture into a tall glass, and garnish as you please. A swirl of whipped cream and a few extra peanut butter cups would look great.
If you’d like to further enhance the chocolatey richness here, try adding a spoonful of cocoa powder or a drizzle of chocolate syrup into the milkshake mixture. Peanut butter and chocolate also pair brilliantly with a range of other flavors, such as banana, caramel, and nuts, so feel free to experiment with any other add-ins that take your fancy.
Bake some pretzel bites
You’ll need just two ingredients and a matter of minutes to bake a batch of crunchy peanut butter cup pretzel bites. Each of these moreish, bite-sized creations is essentially a single, miniature peanut butter cup, sandwiched to melty perfection between two square waffle pretzels. They’re delightfully crunchy, with the perfect sweet and salty balance — they’re dangerously easy to snack on.
To make these pretzel bites, arrange the pretzel squares on a parchment-lined baking sheet while the oven preheats. Top each pretzel with a whole mini peanut butter cup, and place the tray into the oven for just one minute. After this time, the cups should have just started to melt down but will still hold their shape. Working quickly, take more of the pretzels and press them gently on top of each gooey peanut butter cup to create a sandwich. Finally, leave everything to cool at room temperature until fully set. If preferred, you can always omit the second pretzel layer and just melt the cup onto the base. Some recipes top the cups with colorful Reese’s Pieces candies or a salted peanut, instead.
Make peanut butter fudge even more delicious
Peanut butter is one of the most popular fudge flavors, and for good reason. The saltiness of the nuts works fantastically against the sweetness of the other ingredients. And if you’d like to introduce some satisfying texture and chocolatey goodness into your next batch of peanut butter fudge, there’s no add-in more fitting than good old Reese’s peanut butter cups.
For the base of the fudge, follow our fool-proof old-fashioned peanut butter fudge recipe, and we guarantee you’ll achieve delicious results. Once you’ve mixed the melted white chocolate chips, peanut butter, condensed milk, vanilla extract, and salt into a thick, spreadable mixture, it’s time for the peanut butter cups to join the party. Stir them into the fudge mixture, perhaps alongside some Reese’s Pieces, if desired, and transfer everything to a parchment-lined square pan. Top the fudge with another scattering of peanut butter cups, then leave it to set at room temperature for at least two hours. Peanut butter cups can also be incorporated into other varieties of fudge, such as classic chocolate, vanilla, creamy caramel, or even a honey-sweetened fudge.
Combine them with popcorn
When crafting a homemade flavored popcorn, peanut butter cups should definitely be considered as a mix-in. The mini cups are the perfect size for tossing amongst the light, crunchy corn; they can be easily paired with even more peanut butter and chocolate to create a truly epic snack. Start by popping your corn kernels, whether that’s on the stovetop, in the microwave, or in a popcorn maker.
Next, melt some peanut butter until it’s nice and runny, and stir this through the popped corn until it’s coated evenly. Now, toss in the peanut butter cups (you can cut them into halves or quarters if preferred) and stir these through, too. Line a baking sheet with parchment paper, and spread the popcorn mixture on top in an even layer. Then, melt some milk chocolate chips in the microwave, and drizzle the chocolate all over the popcorn. Finish with a sprinkling of flaky sea salt, then leave your mouth-watering creation to set. After an hour or so, it should be ready for you to dig in and break off a chunky, chocolate and peanut-infused cluster.


