
We may receive a commission on purchases made from links.
Infusing alcoholic spirits is one of the most effective ways to up your cocktail game. It’s a skill that, once mastered, opens the door to making incredibly unique, boundary-pushing beverages. The core concept of infusing a spirit is pretty straightforward — you’re essentially just adding ingredients to liquor and waiting for the flavors to transfer over. However, the reality is a little more complex.
Creating the perfect infusion can be tricky and requires knowing how to balance ingredients, timings, and techniques to produce the right results. It’s a fine line to walk, and a slight misstep can result in an unpalatable disaster of a drink that’s ultimately just a waste of good booze. When done right, it’s a shortcut to layered, complex flavors that you’d struggle to achieve any other way. Once I’d nailed the fundamentals as a cocktail bartender, I dove eagerly into the realm of infusions. I was also extremely fortunate to get hired as the bar manager for an upscale restaurant that afforded me the time, resources, and freedom to experiment and learn to my heart’s content. Over the years, I’ve made some awful infusions, but I also crafted some recipes that I’m extremely proud to call my own. Here are the most valuable lessons I learned for infusing spirits like a pro.
Plan out your infusions beforehand
They say that if you fail to plan then you should plan to fail, and this mantra is as true for creating a spirit infusion as it is for inventing a new cocktail. There’s an unavoidable element of trial-and-error when you’re infusing spirits, but having a plan in advance helps to cut down on that “error” part. Failure can be a lesson but it’s also a waste of ingredients and money. Plus, infusions take time, and it’s frustrating if you’ve waited weeks to be met with disappointment.
One of the best ways to plan your infusion is to thoroughly assess your base spirit and identify the key flavors. From there, you can decide whether the ingredients you want to infuse it with will complement, contrast, or clash with the liquor’s taste profile. Take bourbon. If you want to play into its sweet notes, you could try infusing the whiskey with vanilla beans. If you want more depth, dates can also be an excellent choice. When working with tequila or gin, you may want to try something with a tropical fruit character or perhaps some freshly picked berries. For a savory infusion, you’re better off picking a neutral spirit, like vodka, as there’s nothing for the ingredients to clash with.
Some ingredients infuse much faster than others
One of the other reasons it’s crucial to plan your infusion is that ingredients infuse at different rates. Many factors affect how quickly something infuses, including its surface area, density, acidity, water content, and chemical structure. The rate is also impacted by how soluble the ingredient is in water and alcohol, so the strength of the spirit you’re infusing also plays a part.
If you’re infusing a spirit with multiple ingredients, there’s a good chance you’ll need to add them to your concoction at different times to guarantee the best results. Otherwise, you may need to tweak the quantities and possibly chop or crush ingredients to alter their surface area. Even if you’re only infusing with a single ingredient, you run the risk of over-extraction if you leave it in the spirit for too long. This typically results in bitter or astringent flavors, particularly in the case of something like tea which only takes a few hours to infuse a spirit. Chili is another one to be wary of – it doesn’t take long to transform a spirit from something with a pleasant kick to undrinkable firewater. Fortunately, it’s not too hard to find suggested infusion times for specific ingredients online or in cocktail recipe books.
Start small and scale up
I can still remember the first time I attempted to create my own infusion recipe for bourbon. While I did have some semblance of a plan, it didn’t really extend past choosing ingredients I thought would work well. I paid no attention to infusion times and I played very fast and loose with my measurements. However, the most frustrating part wasn’t that the result tasted gross, but that I’d managed to taint an entire bottle of good bourbon thanks to my hubris.
Although I definitely learned some lessons about proper planning, my main takeaway from that experience was that I could’ve saved most of that whiskey if I’d started with a small-scale test batch first. Even if you’re following someone else’s tried and tested recipe, the amount of variables involved with infusing spirits means it’s still a good idea to scale things down first. It’s not hard either, as you just need to maintain the correct proportions. For example, if you’re using a tenth of the amount of required liquor, you’ll want to divide the quantity of each ingredient by 10 as well. You can even tweak the variables and have multiple test batches infusing at one time. When you’ve got the perfect sample, simply scale the recipe back up for a bigger batch.
Take detailed notes
If you’d asked me to name the most useful bar tool when I started out as a cocktail bartender, I’d have probably said it was the shaking tin. Maybe the jigger or bar spoon. However, when I moved up the ranks and became responsible for creating new cocktail recipes and infusions, my answer became “my notebook.”
The only way to maintain consistency when you’re experimenting with infusions is to keep detailed records of every step of the process. This is especially true when you’re adjusting variables to create the best infusion possible. There are few things as frustrating as creating something truly delicious and not being able to replicate it because you didn’t keep track of what you did. The obvious place to start is to jot down the ingredients you’re using and the quantities involved but it’s worth being even more thorough. You should also note down any timings, so you can see how long each ingredient spent in the spirit. That way, if the flavor comes across too weak or too strong, you have an accurate idea of how much you need to adjust the timeframe by. You might also want to record details such as the temperature of the infusion and whether you shook or stirred the concoction at any point.
Use scales for the most accurate measurements
Although it can be tempting to measure out your ingredients by volume when you’re creating an infusion, you’ll get better results if you use weight instead. It might not always be faster but it’s always the superior option when precision is crucial, which is why a good set of kitchen scales is one of the best kitchen tools you can own.
The problem with using volume is that it doesn’t account for things like density, water content, or the shape of the ingredients. As I mentioned earlier, these are all things that can affect the speed at which ingredients will infuse your spirit. Volume can be inconsistent, especially if you’re using small ingredients that can be packed down to fill a smaller space. Weighing your ingredients removes that risk of inconsistency and makes it much easier to accurately scale up your recipe. There’s also the fact that volume measurements can vary from region to region, with measurements like cups and pints changing depending on where you are. Lastly, while I might be biased because I’m British, I recommend using metric units. It’s much easier to make precise calculations and conversions with a standardized base-10 system than with the archaic imperial system.
Label everything
One of the trickier aspects of infusing spirits is keeping track of everything, especially when you consider that many infusions can take weeks to reach fruition. If you’ve got multiple recipes on the go or you’re working on a selection of small test batches, it’s frustratingly easy to get things mixed up. The solution is remarkably simple if you’re disciplined with it – simply label every container with the important details.
Fortunately, you don’t have to stick too much information on the label itself, just the stuff you need to check at a glance. This includes the date you started the infusion and, if you’re using ingredients that infuse quickly, you might want to add the time on as well. It’s up to you but I tend to write the date that I need to check the infusion’s progress as well. For the rest of the info, it’s easier to keep it written down in your notebook and use a key system. Personally, I prefer to number each of my infusion containers and have the corresponding information – such as the contents, quantities, and timeframes – logged in my notes. I also like to use food prep labels, as these are easy to peel off your containers without leaving residue.
Stick to glass containers to avoid flavor contamination
If you’re putting in the time, money, and effort to create a delicious infusion, the last thing you want is for the spirit to become tainted by its container. It would be super handy if we could just infuse the spirit directly in the bottle, but that’s rarely feasible. You have to be able to get the ingredients down the narrow neck of the bottle and even if you’ve got a funnel, you have to factor in displacement. If you don’t empty some of the liquid, the added volume will make the bottle overflow.
Although plastic containers can work with infusions, there’s a chance they’ll negatively impact the flavor of your infusion. There’s also the chance the type of plastic may leach chemicals into your concoction. I’d avoid anything made of metal, too. Stainless steel is the safest metal from a contamination standpoint, but it’s better if you can visually monitor your infusions while they do their thing. This leaves us with glass, and I wouldn’t suggest anything else. I highly recommend mason jars, as they have a wide rim that makes it incredibly easy to add and remove ingredients. They also come in tons of different sizes, so you can use smaller jars for test batches and upgrade to larger ones when you’re ready to upscale the recipe.
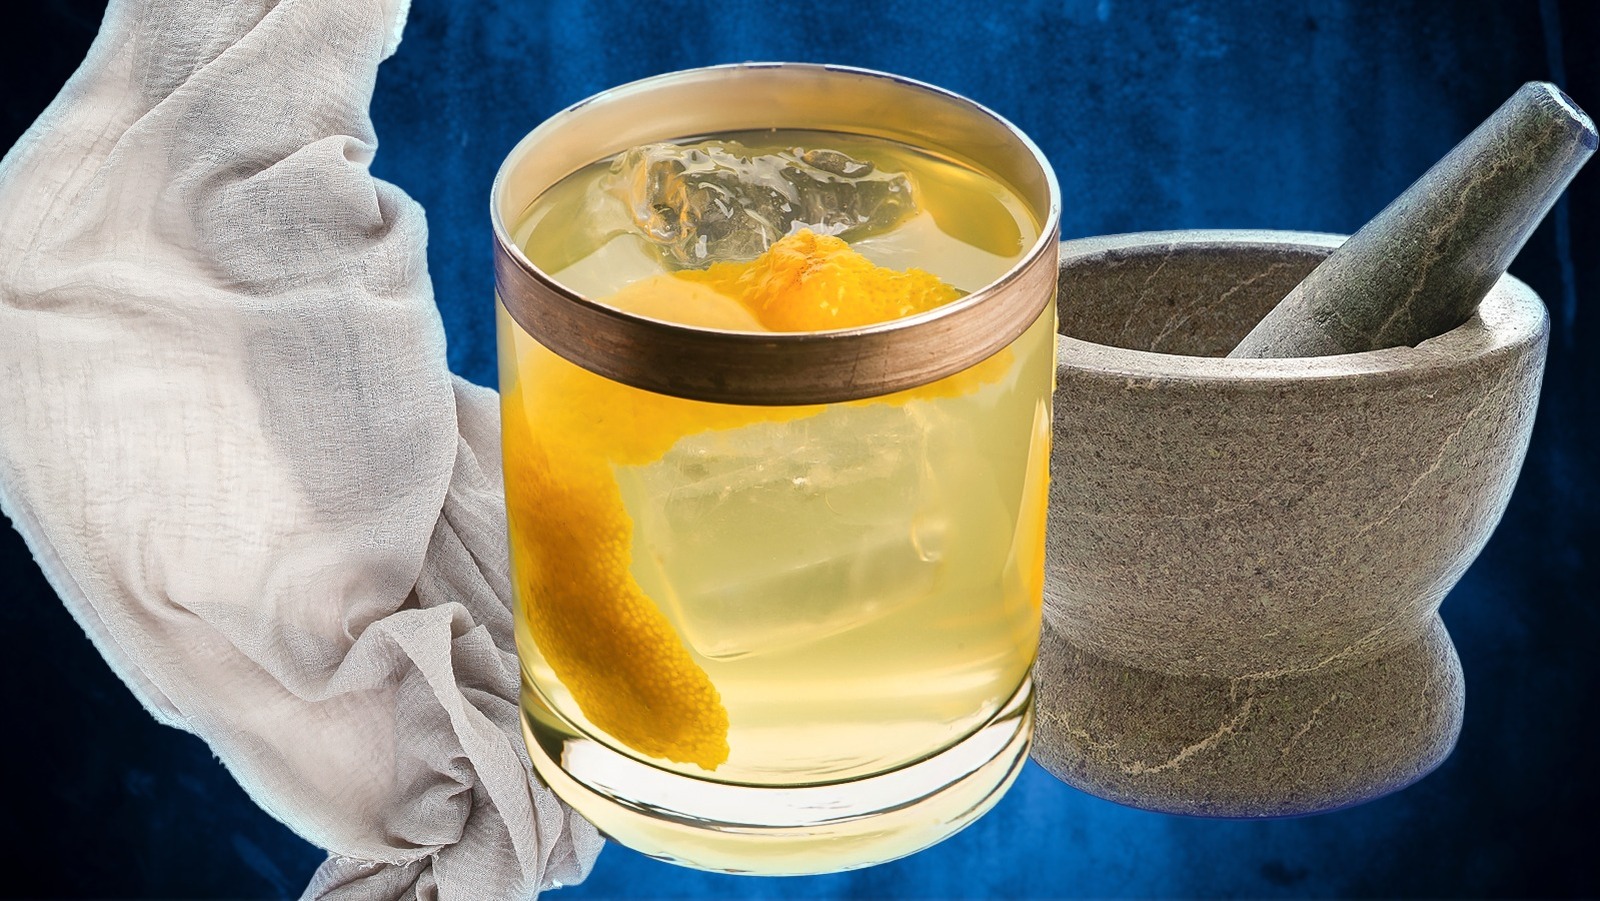
A mortar and pestle can help extract more flavor
Earlier, I mentioned how the surface area of an ingredient affects the way it will infuse into a spirit. It’s Science 101 – the more area that’s in contact with the liquid, the more area there is for chemical reactions to take place. This can cut down on the infusion time and improve the concentration of the flavors released. For some ingredients, it’s as easy as cutting them down to size. Others, you’ll need to crush, and there’s no better tool for the job than a quality mortar and pestle.
Besides increasing the surface area of ingredients, crushing can also improve the amount of flavor they release. Things like nuts, seeds, citrus peels, and certain herbs contain juices, essential oils, and volatile compounds that hold vast amounts of flavor, and crushing them helps release these. The main thing to be wary of is that some ingredients need to be treated more gently than others. Plant-based ingredients, like mint and other herbs, release bitter compounds when they’re broken down too much, so these will need a softer touch.
Cook your ingredients to give them extra depth
Another way to get more flavor out of your ingredients is to lightly cook them first. Cooking ingredients can help caramelize natural sugars, creating deeper, sweeter flavors. Heat breaks down cell walls, which helps release flavor compounds, and it can soften sharp or bitter flavors. You can roast, toast, grill, poach, or caramelize an ingredient depending on what it is and what tasting notes you want to achieve.
To start, you want to think about how the new flavor will interact with the base spirit and any other ingredients you’re using. For example, if I’m working with whiskey, I’m more likely to cook an ingredient so its depth of flavor matches the dark liquor. I’m also probably going to toast it to add a complementary smoky element. If I want to add fruit to a light spirit, like white rum, I’m more likely to keep it fresh. However, if I’m working with an earthy tequila, I might want to poach the fruit so it can stand up to the strong agave character. Cooking the ingredient might not always be the best choice but it’s a good option to be aware of. This is why test batches are so handy – you can always try an infusion both ways before you finalize your recipe.
Fat washing makes for smoother spirits
If you’ve dabbled with infusions before, it’s possible you’ve heard about the practice of fat-washing. Fat washing works on the basis that alcohol is both water- and fat-soluble, meaning it’s possible to infuse a spirit with fats and oils under the right conditions. Not only does fat washing allow you to imbue a spirit with even more flavors but it also transforms its texture, resulting in a creamy, velvety mouthfeel.
Different fats and oils produce unique results, and you can use anything from regular butter to coconut oil. Bacon grease-infused bourbon is a particularly popular fat wash, but the whiskey can also be enhanced with more neutral fats like duck fat or even olive oil. I’ve had some wonderful results fat washing vodka with peanut butter, and I look forward to trying Tasting Table’s Nutella-washed dark rum recipe. The best part is fat washing is surprisingly straightforward. Once you’ve allowed time for the fat to infuse in the spirit, pop the mixture in the freezer until the fat solidifies and separates from the alcohol. Then, you can simply skim off the solid fat and strain out the smaller particles. The most important thing to remember is to ensure your container is freezer-safe to prevent it from breaking.
Clarified milk punch is a guaranteed people pleaser
In the modern cocktail world, clarified milk punches started becoming popular around 2010, but the drink style is actually much older. Centuries older. The earliest recorded milk punch recipes date back to the early 1700s. Some might argue that this style of drink doesn’t technically count as an infusion, but it’s certainly infusion-adjacent and delicious enough to be worth talking about.
Unlike a regular milk punch, the clarified version isn’t actually milky but entirely translucent. However, it still retains the thicker, velvety mouthfeel of the dairy component. To start, you’ll need to make a punch. Bourbon and brandy were the traditional spirits of choice but you can use whatever you like. You’ll also want to add some citrus, spices, a sweet component, and some tasty fruit. Tea was another popular addition back in the day – I find Earl Grey to be a great pick. When the punch is ready, the final step is to add milk which curdles when it meets the acidic citrus. One of the side effects of that chemical process is that certain impurities, including coloring compounds, bind to the dairy. The larger curds can then be skimmed off the top, while the excess sinks to the bottom of the punch to be filtered out. You’ve essentially turned an opaque concoction into an elegantly clear, silky-smooth drink without losing any flavor whatsoever.
Cheesecloth makes for the best filter
I’ve mentioned filtering and straining a few times so far and want to emphasize that it’s an extremely important step in any infusion process. Residual pieces of ingredients will negatively impact the texture of your infusion, but there’s another downside – anything left in the spirit will continue infusing with unwanted flavors. Most infusion recipes suggest using cheesecloth for straining and I’ll admit that, when I first started experimenting with infusions, I ignored them. I was wrong.
Cheesecloth is food-grade cotton fabric traditionally used for separating the curds and whey during cheesemaking. There are alternatives to cheesecloth that can be useful in some situations, but I’ve found they’re not cut out for sufficiently straining infused spirits. Fine mesh sieves aren’t fine enough and coffee filters lack versatility. Butter muslin isn’t a terrible choice, but I find it’s too fine and slows down the filtration process. Cheesecloth, on the other hand, has a slightly looser weave and can be cut to fit any container or funnel size and secured easily with a rubber band. It’s also remarkably cheap and can be washed and reused to an extent, so while it can be a little tricky to source, it’s well worth the investment.
Brush up on the science
At the end of the day, infusing a spirit is chemistry, and you can get as nerdy as you like with it. There’s nothing wrong with sticking to the basic approach of steeping ingredients in liquor and using a little trial-and-error to get the best results but brushing up on the science of infusions will take you far.
With a little know-how, you can greatly enhance your infusion skills to create incredibly unique concoctions. You’ll be able to save time by making creative use of a sous vide machine or even a whipped cream charger to speed up the rate and intensity of your infusions. You’ll also be able to quickly assess the viability of recipes and specific ingredients without having to wait weeks for the result of a trial run. If it all sounds a bit daunting, fear not. There are plenty of accessible resources that cover the subject. I suggest starting with Dave Arnold’s Liquid Intelligence which is arguably one of the most influential cocktail science books of all time. If you’re serious about upping your infusion game, or at least want to understand why some recipes work where others don’t, it’s worth getting stuck into the science.


