
The smoker is an essential tool in any would-be barbecuer’s arsenal. From a classic brisket to a whole chicken to — bear with us – an iced coffee, smoking is a fantastic technique to infuse whatever you’re cooking with a sublime depth of flavor. It’s also, when done right, the secret to slow cooking tender, juicy, fall-apart meat. Take, for example, the smoked ham. This humble cut of meat, when treated with care and cooked properly, becomes a thing of beauty: Meaty and surprisingly delicate, with a lovely sticky sweet glaze on the outside. Smoking enhances the meat’s natural flavors, whilst adding a complexity that just can’t be beat. But cooking ham really, really well is still as precise an endeavor as smoking any other meat, and there are a few tips and tricks to know to stop it from drying out.
The secret, really, is twofold: Fat and temperature. Having enough fat content (and, in turn, adding enough liquid during the cooking process) helps retain any moisture as the meat smokes and the fat renders, ensuring a juicy final product. How hot you let your smoker get (or rather, how low you can keep the temperature) meanwhile, is crucial to avoid overcooking. Keeping the ham at a low temperature (and importantly, a consistent one) will allow instead for even cooking and the absorption of that classic smoky flavor, whilst ensuring that the all-important moisture stays inside the meat, rather than evaporating away and leaving it dry and tough. Remember: Low and slow!
Preparing your ham for the smoker is crucial

Making a great smoked ham is a process that starts long before the meat goes anywhere near a smoker. In fact, the preparation process is almost as important as the cook itself! Many expert pitmasters swear by brining, for example, to give their hams both a boost of flavor and a serious upgrade when it comes to texture. When smoking a fresh ham, brining is particularly useful — giving the meat a nice long salt bath will allow it to absorb moisture (as well as that intense salty flavor) and soften its muscle fibers, resulting in a more tender, more flavorful final product.
You’ll likely recognize a beautifully hatchet-scored fat cap as a sign of a ham you want to eat — but this decorative flair also has a practical purpose. Beyond the obvious fact that it looks rather impressive, scoring the fat properly also allows it to render more effectively, which will mean the meat essentially bastes itself throughout the cooking process, helping it stay nice and moist while allowing the flavor of your seasonings to penetrate deeper. It’s also important, like with cooking any protein, to let it come up to temperature before you put it in the smoker — this will ensure an even cook throughout, helping you avoid the dreaded “grey band.” Take your ham out of the fridge well before you cook it, and allow it to sit at room temperature: Smoking it from cold will result in tougher, drier meat. And nobody wants that!
How to smoke your ham to perfection

Once you’ve properly prepped your ham, given it a good bath, scored it, and seasoned it, it’s time to get it in the smoker. The name of the game here — as we said earlier — is low and slow. You’ll want to make sure your smoker is pre-heated (remember, consistency is key) and keep the temperature between 225 and 250 degrees Fahrenheit to stop things from drying out. As any chef worth their salt will tell you, when cooking meat it’s always better to rely on temperature than time, so if you don’t have one already, get yourself a probe thermometer (trust us, you’ll never mess up a steak again.) For a great fresh smoked ham, you’ll want an internal temperature of 145 degrees Fahrenheit — or if you’re reheating one (which is probably more likely), 140 degrees Fahrenheit is fine for any pre-cooked ham that was packaged in a USDA-inspected facility.
While your ham smokes, you’ll want to consistently baste it (there’s that consistency again). Every 45 minutes to an hour is a good timeframe to aim for. You can either use broth for an intense, meaty infusion; or apple juice, which will give you a lovely sweetness that perfectly complements the ham’s natural flavor profile. Speaking of sweetness, if you’re glazing your ham, wait until the final smoke (about half an hour from the finish) to glaze it, to make sure you avoid burning anything. Use a glaze with an acid, like vinegar or Dijon mustard — it’ll help break down muscle fibers in the meat, tenderizing it even further.
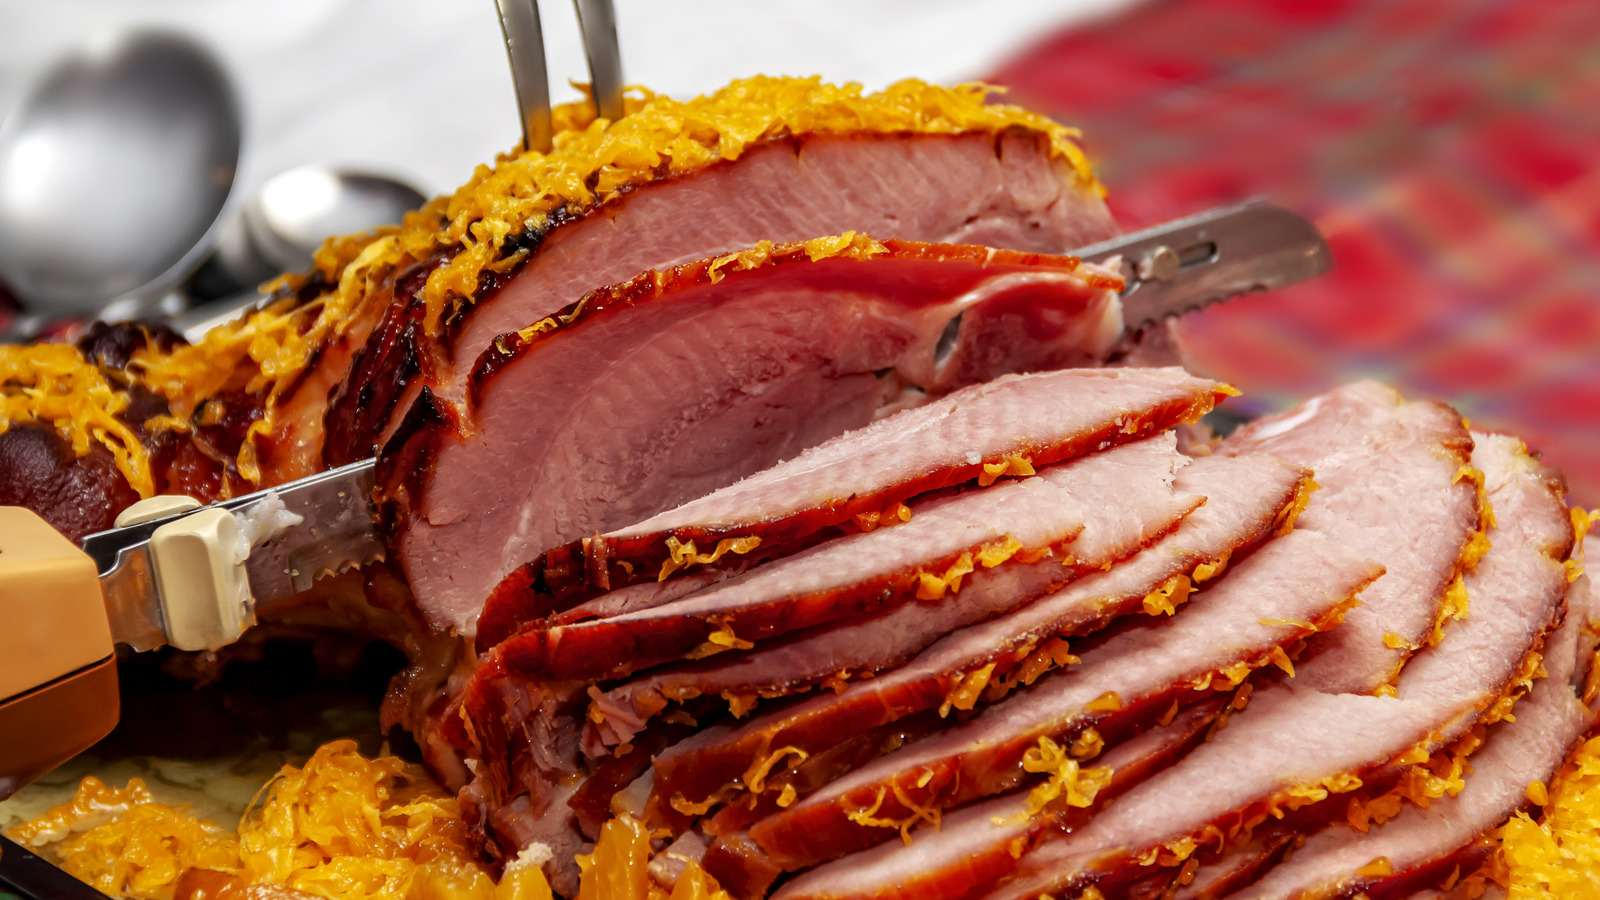
Finally, resting and carving your ham is crucial to keep things tender and delicious

The work doesn’t stop when your ham comes out of the smoker. As with any red meat, it’s important to let it adequately rest before carving and serving it. This will allow the juices to effectively redistribute throughout the meat, preventing you from running into any grey, dry patches. Try to leave it for at least 20 minutes if you can — a ham can sit at room temperature for up to two hours, and giving it that extra time out of the oven can be a real game changer if you’re looking for the juiciest ham possible. Then, once it’s time to serve, much like with a steak, you’ll want to cut the ham against the grain of the meat, giving it one last layer of tenderization before it’s served.
That goes for all kinds of smoked ham, whether you’re cooking one fresh or reheating one that’s been pre-cooked. A “city ham,” as the latter is more commonly known (as opposed to the dry-cured “country ham”), is a particularly great option for beginner pitmasters — they come having already been cured in a salt-brine, so they’re packed with flavor right out the packet, and all you really need to do is stick them on the smoker, and keep an eye on that temperature to ensure you avoid overcooking. And there you have it. Perfect, foolproof smoked ham, every time.


