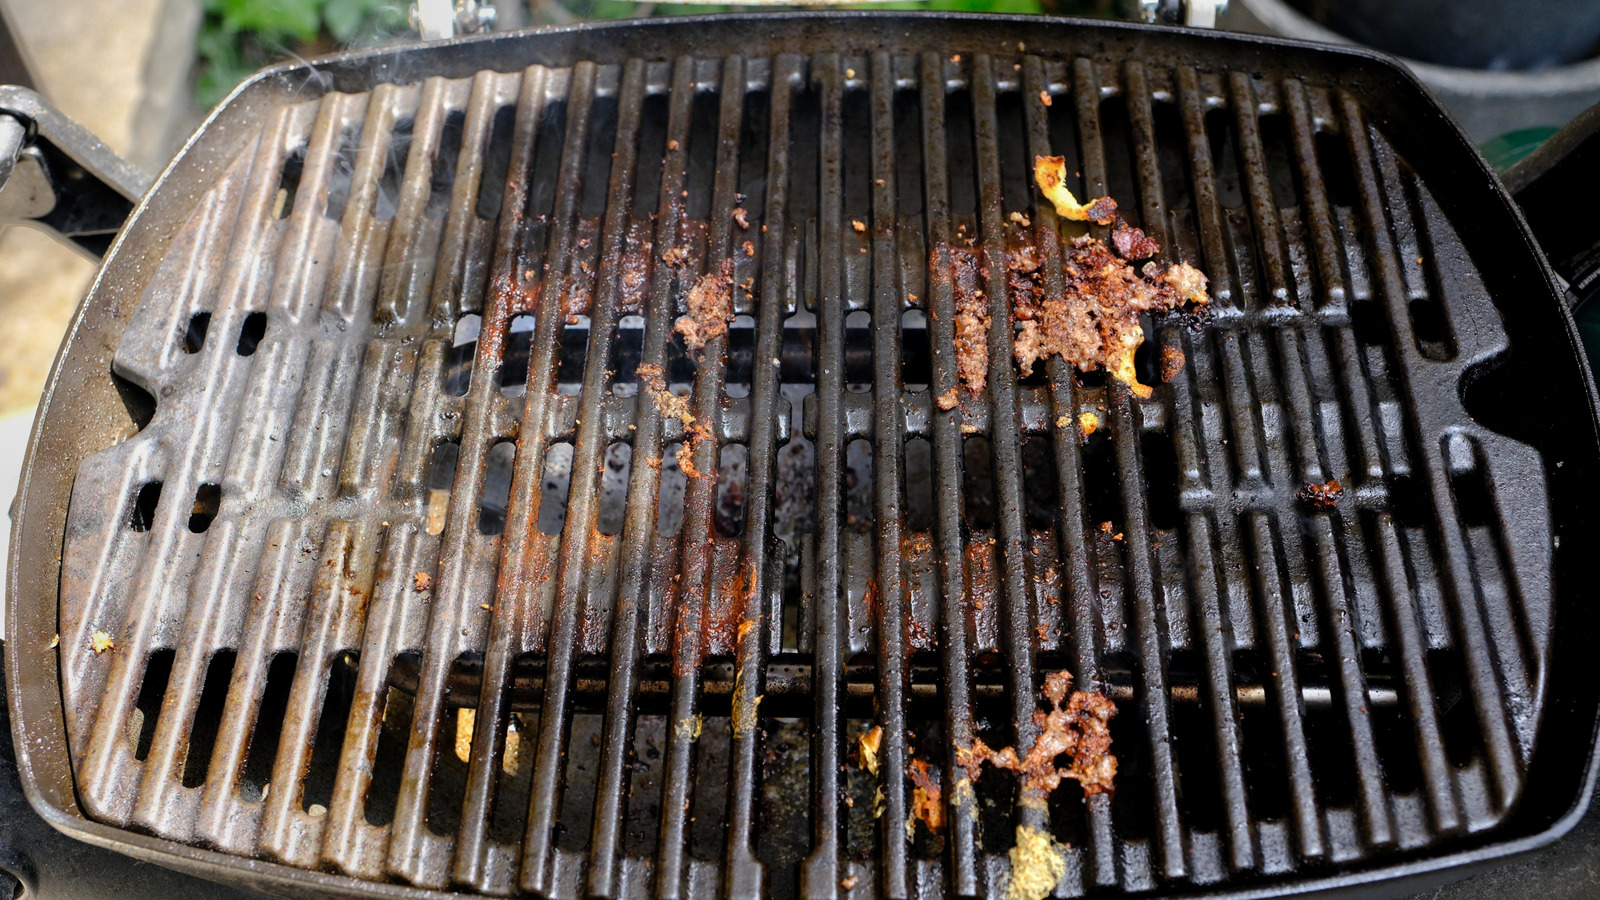
You don’t need a spotless grill to make good food — but if it’s covered in last month’s leftovers, you’re probably not getting the best results. A dirty grate can mess with flavor, cause flare-ups, and slowly wear down the parts you depend on. Most folks know they should clean more often, but it’s easy to let it slide, especially when everything still technically works.
Some jobs are simple — a bit of grease, a few bits of stuck-on food. Others feel like an archaeology dig through layers of char. Whatever your situation, there’s a way to deal with it that doesn’t involve hours of scraping. Some methods are quick enough to knock out after dinner. Others are better when you’ve got time to really dig in.
You don’t need anything fancy, either. A few things from your kitchen or garage will get the job done. These nine methods range from light touch-ups to full deep-clean strategies. Pick the one that makes sense for your setup, and your grill will stay in better shape — which means fewer problems, better food, and way less frustration the next time you fire it up.
Preheat and brush
Preheating and brushing might not sound exciting, but it’s one of the easiest ways to keep your grill from turning into a crusty mess. You’re basically using heat to do the hard part for you — loosening all the stuck-on bits before you even grab a brush.
Here’s how it works: Fire up the grill, close the lid, and let it run on high for 10 or 15 minutes. That kind of heat will torch anything left behind from your last cookout — grease, sauce, little burnt pieces — and reduce it all to ash. It doesn’t just clean the grates; it also burns off buildup that can mess with flavor or cause flare-ups.
Once things are dry and dusty instead of sticky, grab your brush. Stainless steel ones work best for most grates. Scrub while the metal’s still warm but not too hot to handle — the timing makes a difference. The heat makes the gunk brittle, so it flakes right off without much elbow grease.
This is one of those habits that takes two minutes but saves you from doing a deep clean later. It also keeps your food tasting like it’s supposed to. You don’t want today’s burgers picking up yesterday’s salmon. If you grill often, this step is well worth working into your routine — fast, easy, and surprisingly effective at keeping the mess under control.
Foil ball scrub
Sometimes, you forget the brush. Or you realize too late that the one you have is falling apart. When that happens, a wad of aluminum foil can save the day.
It’s a quick hack that works better than you’d expect. Just tear off a big piece of foil, crumple it into a tight ball — somewhere around the size of a tennis ball — and you’re good to go. The tighter you pack it, the more pressure you’ll get while scrubbing. And don’t skip the gloves or tongs — especially if the grill’s still hot.
Foil’s soft enough that it won’t scratch up your grates, but it’s got enough texture to scrape off the gunk. It molds to the shape of the grates, too, so it gets into corners and curves better than a flat scraper. If the grill’s already hot, even better — the heat helps loosen everything up while you scrub.
This move is perfect for campsite cookouts, surprise messes, or anytime you just want to avoid wire bristles. When you’re done, toss the foil and call it good. No cleanup, no stress. It’s not fancy, but it works — and it’s probably sitting in your kitchen drawer right now.
Onion scrub
It might sound strange, but using half an onion to clean your grill actually works. It’s one of those old-school tricks that a lot of backyard grillers swear by — no chemicals, no special tools, just something from the kitchen that does the job.
Grab a big onion and cut it in half across the middle so you’ve got a nice flat side. With a grill fork or heat-proof tongs, press the cut side against the warm grates and start scrubbing. The heat helps release juices from the onion, which softens up stuck-on food and cuts through light grease. It’s not going to replace a deep clean, but for day-to-day use, it’s surprisingly effective.
The texture of the onion gives you a bit of gentle scrub, and as it breaks down, it leaves a subtle aroma behind — not enough to change the flavor of your food, but enough to make the grill smell kind of great. Just don’t try this on a grill that’s covered in layers of burnt gunk. It’s a light-duty move, best used right after cooking or before your next session.
If you like to keep things natural and low-effort, this is an easy and cheap method to have in your back pocket — especially when you’re out of foil or forgot the brush again.
Lemon and salt scrub
If your grill’s looking rough and you want a natural fix, lemons and salt are a solid combo. You get a bit of scrubbing power and a grease-cutting boost — without spraying on something you can’t pronounce.
Start by firing up the grill. This method works best when the grates are hot. Cut a big lemon in half, press the cut side into some coarse salt, and get to work. A firm grip helps, but if the heat makes things tricky, stab a fork into the back of the lemon or use a pair of tongs. As you scrub, squeeze a little juice out here and there to help the process along.
Between the grit of the salt and the acid from the lemon, you’ll start to see old grease and gunk lift off pretty quickly. It’s not just surface-level, either — this trick cuts through residue that’s been sitting there a while. Bonus: it smells a lot better than charred leftovers, and you’re not risking bristles in your burgers.
This is a great alternative when you’re out of gear or just want to skip the chemicals. And if your grill’s already cooled down, you can still make it work. Mix lemon juice with a bit of water, spray it on the grates, let it sit for five or ten minutes, then wipe with a paper towel. It’s cheap, simple, and leaves your grill looking better — and smelling a little fresher too.
Vinegar spray
Vinegar might not smell great, but it’s one of the best cheap grill cleaners out there. It cuts through grease, doesn’t mess with your food, and you probably already have a bottle sitting in the pantry.
To make the spray, just mix equal parts white vinegar and water in a spray bottle. That’s it. Make sure the grill’s completely cool — vinegar does its thing better when it doesn’t instantly sizzle off. Plus, you’re not trying to steam your eyebrows off.
Give the grates a generous coating, especially in the spots where stuff’s really stuck. Then, let it sit for five to ten minutes. During that time, the vinegar starts breaking down the grease, so you don’t have to scrub like a maniac later.
Once it’s had time to soak in, wipe everything down with a rag or paper towel. You can also follow up with a foil ball or brush if there’s still some tough stuff hanging on. It’s not just about looks, either — vinegar has natural antibacterial properties, which is a nice bonus after cooking with raw meat.
This trick works well on its own for basic upkeep, but it also pairs nicely with other methods if you’re doing a full clean. No harsh chemicals, no mystery ingredients — just something simple that gets the job done and leaves your grill ready for the next round.
Baking soda paste
When your grill is caked in layers of old grease and char, a quick once-over won’t cut it. That’s when baking soda paste comes in — it’s the go-to move when things get out of hand.
Start with the basic version: about a cup and a half of baking soda and half a cup of water. Stir it into a thick paste that sticks to the grates. If you’re up against serious buildup, add a bit more firepower — a splash of dish soap and a little white vinegar turns it into a fizzy, deep-cleaning mix that breaks down just about anything.
Spread it over the grates and let it sit. For stainless steel, wait a few minutes and then scrub with a foil ball. If you’ve got porcelain or enamel grates, skip the paste — just sprinkle dry baking soda onto damp grates and use a soft sponge so you don’t damage the coating.
For grills that haven’t seen a cleaning brush in months, try the overnight method. Slather on the baking soda mix, close the lid (no heat), and walk away. By morning, the gunk will have softened up so much it practically wipes off.
It’s not glamorous, but it works — and it saves you from spending an hour scrubbing like a lunatic. Just a little prep and patience can make even the worst mess feel manageable.
Pumice stone scrub
If you’ve ever seen a pro clean a grill, chances are they were using a pumice stone. These things are like erasers for burnt-on grease — no wires, no bristles, just solid scrubbing power. If the grill experts do it, you know it’s worth a try.
A pumice grill brick is basically a chunk of soft, gritty stone that grinds away the carbon and grime stuck to your grates. It’s especially handy if you grill a lot or let things build up a little too long between cleanings. The flat shape fits well across most grate patterns, and the stone slowly wears down to match your grill’s grooves as you go.
You can use it on a warm or cool grill, but warm is usually easier — the heat softens up the gunk and makes scrubbing faster. Just apply steady pressure and go back and forth across the grates. No special trick to it.
If you want to level it up, rub a little cooking oil on the grates before you start. It’ll mix with the grit to help carry the mess away, but don’t go overboard — too much oil can make things slippery or splatter when heated.
You might notice a bit of stone dust after, but it wipes off easily. And unlike wire brushes, there’s no risk of metal bits ending up in your burger. It’s a go-to method for restaurant kitchens and serious grillers for a reason — it works.
Dish soap
Sometimes, the simplest solution is still the best — and dish soap absolutely earns its place in the grill-cleaning lineup. If your grates are coated in grease but you’re not dealing with deep-charred gunk, this is a reliable, low-stress option that just works.
Start by removing the grates and spraying them down with dish soap — the concentrated stuff like Dawn Powerwash is great, but even regular dish soap mixed with water in a spray bottle does the trick. Let it sit for five to ten minutes. That soak time makes a big difference; it gives the soap a chance to loosen up grease and food bits so you don’t have to scrub like crazy.
Once it’s had time to work, grab a stiff nylon brush or even a bristle-free scrubber and go over the grates. The mess should come off pretty easily, especially if you didn’t wait too long between cleanings. Rinse thoroughly with a hose or in a deep sink to make sure no soap lingers.
It’s perfect for regular upkeep and doesn’t require anything fancy. Just remember, if your grill has cast iron grates, dish soap can strip the seasoning — so you’ll need to re-oil them. But for stainless steel, porcelain, and everything else, this is a no-fuss method that’s easy to repeat whenever your grill needs a refresh.
Dedicated degreasing solutions
If your grill’s seen better days — we’re talking layers of cooked-on crud from last summer still hanging around — then it might be time to break out the big stuff. Heavy-duty degreasers aren’t anyone’s first choice, but when nothing else is working, they’ll get the job done.
You’ll find these cleaners in different forms: sprays, foams, or concentrates. Foam is nice because it sticks to the grates a bit longer, which gives it more time to work its way through the mess. A lot of them are soak-and-wait situations — spray it on, leave it overnight, and let it do the work while you do literally anything else.
They’re strong, though. Not everything on your grill can handle that level of chemical intensity, so it’s worth reading the label closely. Some formulas aren’t great for aluminum or coated surfaces, and you definitely don’t want this stuff touching anything that’s not supposed to be cleaned. Gloves help, good ventilation’s a must, and once you’re done, rinse like crazy.
After that, give your grates a quick coat of oil so they’re ready for next time. This isn’t the method you’ll use every weekend, but if your grill has hit rock bottom, this is the reset button.


