
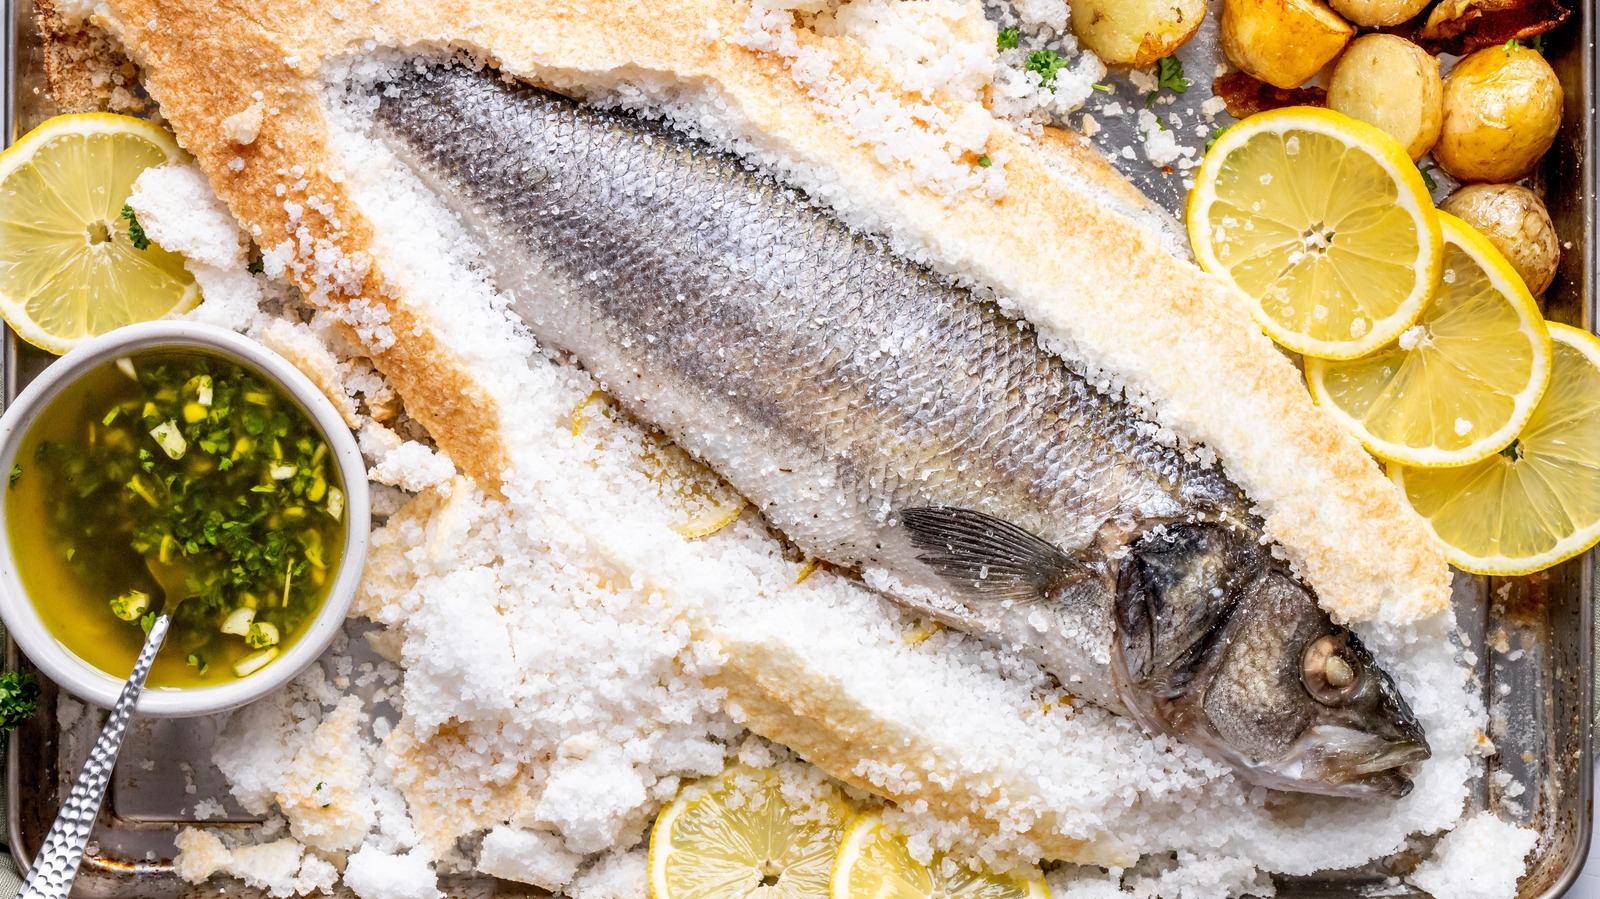
A salt-baked fish is both one of the simplest and most glamorous dishes you can bring to the table. On one hand, it is nothing more than a pile of hardened salt with a whole cooked fish buried in it. On the other, it is a strangely romantic tableau of a creature of the sea shrouded in the very material in which it spent its life.
And the act of serving it is a bit like unearthing a buried treasure. Lift off the hardened salt crust, and you will reveal a perfectly moist and juicy fish fully imbued with the flavors of whatever aromatics you tucked inside it before baking. And do not worry, if you prepare your fish correctly, it will not be excessively salty. Rather, the salt crust should slip safely away, leaving a perfectly seasoned fish. As glamorous as the presentation may be, it is also easy to prepare at home — as long as you avoid a few common pitfalls. Adam Licht, chef and chief fishmonger at All-Fresh Seafood, offered us some expert tips on salt-baking fish the right way.
Choosing the wrong fish will lead to trouble
Salt-baked fish puts the natural flavor of the fish front and center, so it’s crucial you start with good fish to begin with when preparing the dish. Remember, when you remove the salt crust, you’ll be left with just fish (and maybe a few slices of lemon and sprigs of herbs). While you might be able to get away with using a lower quality fish when the recipe calls for heavy sauces or breading, that’s not the case with salt-baked fish. What’s more, it’s important to pick the right kind of fish. According to Adam Licht, no matter how fresh, there are some fish that just do not take well to salt baking.
While you can use whole skin-on filets, Licht prefers whole fish with medium fat content and mildly flavored flesh. “In Europe, branzino is probably the most common,” he says. Other good choices, he says, are red snapper, daurade or sea bream, and wild striped bass. While great in other contexts, oily, strongly flavored fish such as mackerel or most types of salmon are not good choices for salt baking (though some less-fatty West Coast wild salmon species, such as sockeye, can work well). And just as overly oily fish is a no-go, same goes for ultra-lean fish, so avoid white filets in this preparation.
Don’t skip steps when prepping the fish
When salt-baking a whole fish, it’s imperative that you prep it in a way that helps it stay intact once you remove the salt crust. Ideally, you want to be able to peel back the top half of the salt shell in a single piece after baking to reveal the whole fish hidden below. This not only makes the fish look more appetizing and impressive than, say, a fish that fell apart before you presented it to your guests, but it also makes it taste better. The skin of the fish protects the flesh from becoming too salty. When skin sticks to the salt crust and tears, it may expose the flesh to stray salt shards, which can ruin its flavor.
To ensure your fish looks and tastes its best, here is how to proceed. First, trim the fins off the fish. If you do not get this out of the way, they will just poke you and be a bit of a nuisance. Next, a smart move is to rub the fish with a layer of olive (or other) oil before laying it on its salt bed and covering it with more salt. This will help keep the skin from sticking to the salt and help you remove the salt crust more cleanly before serving.
Baking in table salt is a big mistake
Once you have picked out which fish is right for your meal, you should then make sure you choose the right salt. You might think that the type of salt would not make much of a difference, since nobody’s going to eat the salt anyhow, but consider this: The salt essentially forms the cooking vessel for the fish. And since you want the fish to cook in a stable, fully sealed shell of salt, you will need salt that can easily form such a structure. Some salts work far better than others.
Kosher salt is the standard option in most recipes. You may need between 2 and 3 pounds of salt to cover a good-sized fish, and the larger grains make the salt crust mixture easier to control and easier to break off cleanly before serving. (Salt shells made with smaller-grained salt tend to shatter when cracked, which can coat your fish with more salt than you might want to eat.) This is why Adam Licht relies on kosher salt for his salt-baked fish and warns against using regular table salt. “It is way too fine and it won’t work well,” he says.
Take care not to wet your salt too quickly
Salt is not the only ingredient in the crust for a salt-baked fish. To form a cohesive crust, you need to moisten the salt with either egg white, water, or a mixture of both. The secret to success is to recognize when the salt is just moist and cohesive enough to make a sturdy crust. “The goal is to make wet sand that can be formed,” Adam Licht says.
Licht likes to make his salt crusts with egg white, and to coat a 2-pound fish (a typical size for salt baking), he recommends starting with 6 cups of kosher salt and 4 egg whites. If the mixture feels too dry to hold together even after you’ve mixed in the whites, you can add a bit of water to moisten it further. However, if you are faced with a dry-looking pile of salt, it can be tempting to pour in a generous quantity of water all at once to fix the problem –- but you might just be making it worse. And according to Licht, this is a common mistake. Instead, if your mixture needs more moisture, add water cautiously. “If the mix feels too dry, add 1 tablespoon at a time to get the wet sand consistency,” he advises.
To avoid dry fish, ensure the salt encloses the fish completely
While some cooks add aromatics such as herbs to their salt crusts, this is not really necessary if the fish itself is seasoned. The primary role of the salt crust is not to add flavor, but to serve as a custom-fitted steam-roasting vessel for the fish. The steam released by the fish as it heats moistens the salt, enabling it to form a solid crust that holds in all of the juices of the fish. This solid crust also holds in the flavors and aromas of any aromatics you’ve used, so they will be absorbed into the fish rather than dissipated in oven steam. If all goes well, the result will be a succulent, juicy, and flavorful fish.
This, however, is a big if. If your crust is not totally airtight, the salt might not work its magic. So, it’s mission critical to use enough salt to enclose the fish completely and to ensure that the crust does not have any holes or cracks. “Not sealing the fish in 100% will make it extremely dry -– this is a must,” Adam Licht says. It may take a little extra time and effort to get the crust just right, but it is worth the added effort.
Don’t forget to salt the inside of your fish
When you are prepping a fish for a recipe that requires literally pounds of salt, you might be inclined to assume that the seasoning does not need any additional salt. Alas, this is incorrect. The salt crust is there to insulate the fish, and it does not act as a marinade. “Many people think that the salt is the seasoning,” Adam Licht says. “It actually just protects the fish.”
While the skin of the fish absorbs plenty of salt (so much that it is not typically eaten), it also prevents salt from being absorbed into the flesh of the fish. And while the interior of the fish absorbs plenty of flavor from any aromatics you may have stuffed it with before baking, you will not taste any salt unless you put it there yourself. Thus, to obtain a flavorful fish, Licht advises, you must “season the cavity very well.”
Be mindful when choosing aromatics for your fish
Among the reasons chefs love salt baking is that it is a force multiplier for flavor. When baking fish, it is a common practice to season it by tucking flavorful ingredients, such as slices of lemon or sprigs of fresh herbs, inside the fish before putting it in the oven. As the fish cooks, the flavors of these ingredients begin to meld with the fish to create a harmonious whole.
Salt-baking a fish amplifies this effect. The fish and aromatics are sealed inside the salt crust, the flavors of the aromatics have no place to go but into the surrounding fish. This means they will contribute more flavor than they would be able to with an ordinary baked fish. While this can be a great thing if you want to amp up a flavor you love, it also means that otherwise innocuous amounts of strongly flavored seasonings can easily become overwhelming. For instance, the slightly bitter, resinous aroma of fresh oregano –- essential in many Mediterranean dishes –- can easily overpower the flavor of a salt-baked fish. So when choosing herbs to flavor salt-baked fish, use powerful, woody herbs such as oregano and rosemary sparingly, or opt for more delicately flavored alternatives.
Use a probe thermometer instead of guessing when your fish is ready
Making a salt-baked fish is a pretty straightforward process. Clean and season a fish, embed it in a generous quantity of moistened salt, and bake it until it is done. Figuring out when your fish is done, however, can be tricky. You can’t tell by look or touch without breaking the salt crust, and once it is broken, you can’t restore it to its previous condition if the fish needs more time.
Seasoned chefs certainly can guestimate the time needed based on the size of their fish, the performance of their ovens, and their previous experience with the dish. But if you do not have this experience –- and do not want to risk ruining a pricy whole fish –- you have a foolproof option: a probe thermometer. Do not think of this as cheating; even seafood pros such as Adam Licht rely on this method to ensure consistent results every time. “I like to install a probe in the fish so there is no guess work,” he says. “I cook until 155 so the carry over after 20 minutes pushes it to 165, which is perfect. Don’t guess, use a probe.”
Don’t serve your fish straight from the oven
A freshly cooked salt-baked fish looks and feels like a present waiting to be opened; who wouldn’t be curious to see, smell, and taste the fish it is hidden beneath that hot salt crust? But when you pull your fish from the oven, resist the urge to bring it to the table and tear into it right away. It will not be ready to eat just yet.
You know how grilled meats like steaks need some time to settle after cooking to taste their best? Same goes for salt-baked fish. During this rest period, juices are reabsorbed into the meat, which benefits both the texture and the flavor. In contrast, if you cut into a fresh-off-the-grill steak, you will see these juices spill out of the meat and onto your plate. Similarly, salt-baked fish becomes more moist — and tastes better — if you let it rest a bit before serving. “The fish needs to rest just like a steak,” Adam Licht says. “If cracked too early, the fish will dry out.” So don’t rush. Pour your guests another glass of wine and relax; the short wait (about 5 minutes, just like a steak) will be worth it.
Don’t feel pressured to open the crust at the table
You may be tempted to open the crust of a salt-baked fish at the table as your guests look on in admiration. However, this might not yield the best results. Ideally, you want to be able to crack the shell with a few clean taps and pull back the top of the shell in one piece, revealing the perfectly cooked fish in an aromatic cloud of steam.
But since we exist in an imperfect world, there’s a good chance the shell will shatter into tiny shards, which will require slow and unglamorous work to clear away. Or the shell shards may stick to the fish skin, meaning guests will be treated to the sight of a partially flayed fish. It is not cute. To avoid potentially creating an embarrassing scene at the dinner table, Adam Licht recommends taking the cracking and opening backstage. “I like to show my guests the fish right out of the oven but take it apart in the kitchen because it can be messy,” Licht says.
Don’t forget to take your time when removing the salt crust
While it can be super satisfying to crack open a salt-baked fish and finally see if all of your work paid off, the process of removing the shell can be slow and tedious. This, according to Adam Licht, is another reason to keep the big reveal in the kitchen and away from the table. After all, who needs the added pressure of a whole audience watching your every move? “Go slow and try and lift off the entire side at a time,” he says. “The idea is to take off the largest pieces of salt as possible.” This, he explains, is not only to keep things neater, but to prevent stray shell bits from making the fish too salty.
Once you’ve removed the top layer of salt and uncovered the fish, it is time to prepare it for serving. While some cooks like to present the fish as-is and simply let guests serve themselves, Licht prefers to give them a head start. “The next step is to debone, and I like to take a damp cloth and wipe away any excess salt before boning,” he says.
Don’t serve the skin
While fried and seasoned fish skin is a popular bagged snack in Asian countries, salt-baked fish skin is another story. When it comes time to dish up your salt-baked fish, it is a good idea to make sure the skin has been removed from the meat that is to be eaten. Sure, you can show off the whole, skin-on fish if you manage to get the top layer of the crust off neatly, but the skin itself is not something you want to eat.
When salt-baking, the skin serves as a barrier between the salt shell and the rest of the meat. As previously noted, the skin absorbs an impressive amount of salt, keeping the inside of the fish from getting super salty. The skin, however, does get super salty. Even the most devoted fan of salty snacks are sure to find the skin on a salt-baked fish intolerable. So if you can, peel off the skin and get rid of it before you serve your guests. Or at least warn them to steer clear of it.


