
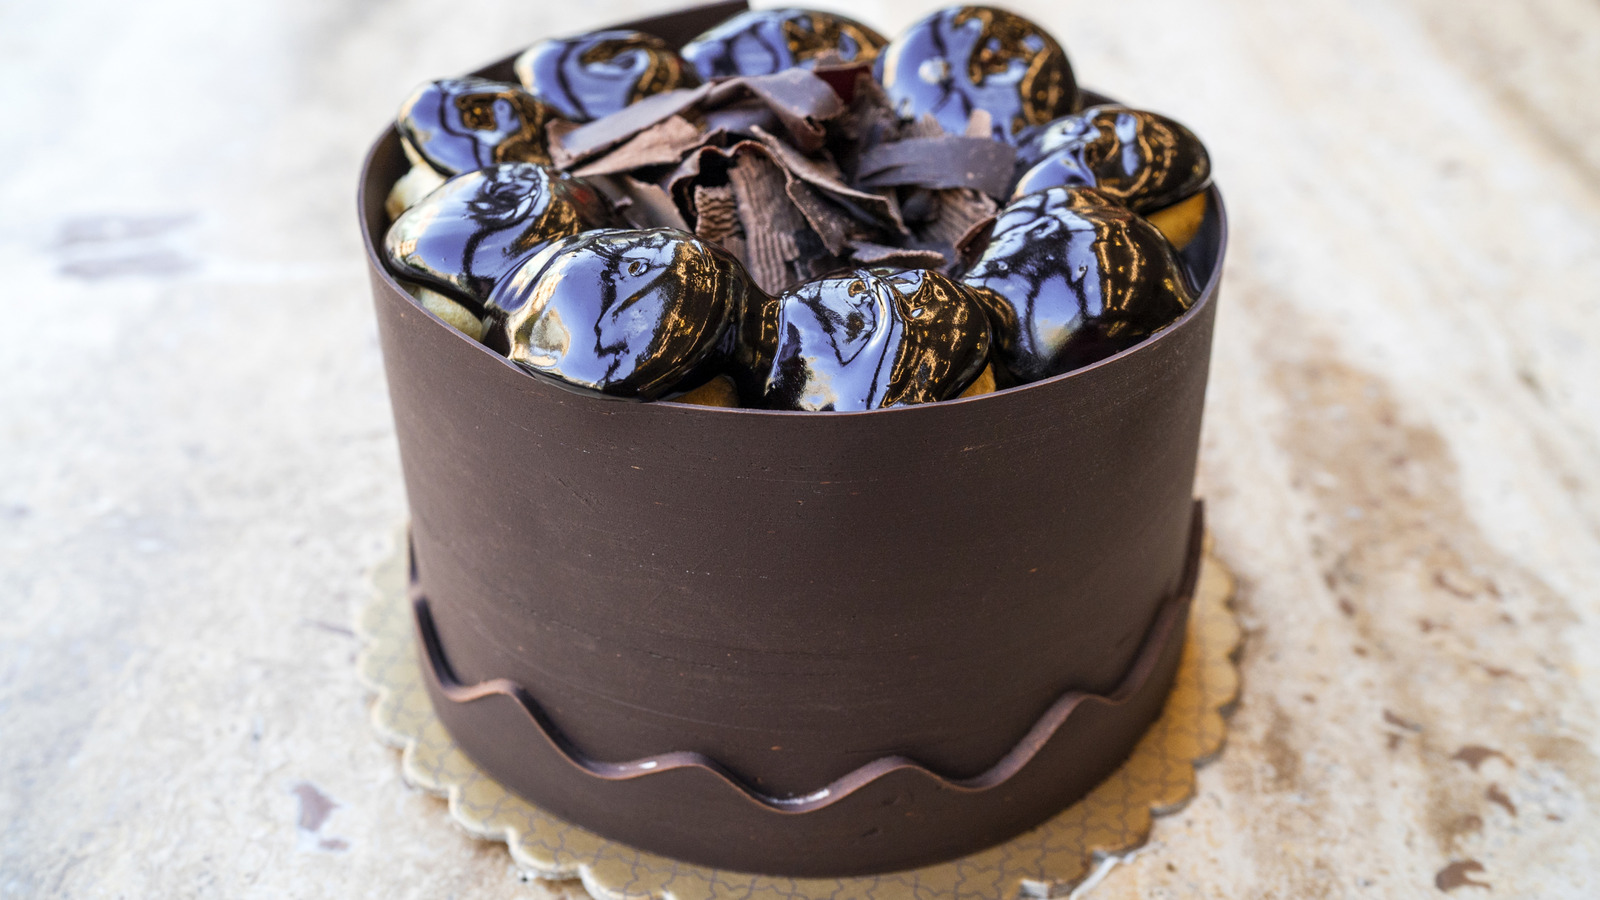
You agreed to provide the chocolate cake centerpiece for your niece’s birthday, but now you’re rampaged with regret. Lopsided and bumpy, the tiered spectacle in front of you is a far cry from a professional delivery. And how is that chocolate dripping again? Instead of anxiously scanning for the telltale sign that your chocolate has lost its temper, it’s best to start from scratch. Tasting Table spoke with Duff Goldman, the celebrity chef and founder of Charm City Cakes (which also sells cakes on Goldbelly), to find the best cake-wrapping strategies.
The premise is simple: Goldman advises starting with a common tool found in art supply stores. “Find some acetate and make sure you get one that’s relatively thick. The really thin acetate is kind of hard to control,” he explains. “The thicker stuff, it doesn’t wrinkle as much, it doesn’t fold as much so you don’t get any creases, and anytime you get a little crease, you’re going to see that in your finished product.” Apply the tempered chocolate to the pre-cut sheet of acetate, then wrap it around the cake to transfer the coating.
Sounds easy, right? Yet, according to Goldman, there’s always room for improvement. Incorporate these additional four tips and be blown away by the results. Here’s how to venture beyond the basics and wrap a cake with chocolate like a pro.
How to perfectly spread the chocolate on the acetate
Even the savviest home chefs are vulnerable to the rookie mistake of taking a strategy and running with it. Curb that enthusiasm momentarily. To tap into that acetate’s full potential, there are some extra considerations to uphold. First, the easy method to temper chocolate like a pro involves melting chocolate twice to really achieve a rich and shiny consistency.
Then, once it’s ready for action, be mindful of how you spread it. “You don’t want it to be too thin,” Goldman explains. “Because the thinner your chocolate is, when you spread it onto the acetate, the quicker it’s going to set up, and there’s a magic window of temperature.”
Finding that sweet spot takes a little trial and error. Hold fire: never immediately plaster the acetate around a cake; instead, let it firm slightly. “While it’s still a little flexible, that’s when you wrap it around your cake,” Goldman specifies. That momentary patience yields stunning results. “When you peel the acetate off, the chocolate will continue to set while it’s on the cake,” he adds. “But it’s already firm enough that it’s not going to drip or droop or anything like that. It’s going to adhere to the cake.” With just a few minor tweaks, bakers achieve smoother end results. Patience and detail orientation are key.
Always start with a good crumb coat
With a shaky building, analyze the foundation; it’s the same for wrapping cakes. Learning how to crumb coat a cake is essential before progressing to more complex decoration styles — never run before you can walk. “You’ve got to make sure that when you’re icing, it’s really clean, and the cake itself is really super smooth,” Goldman emphasizes. “The thing about that chocolate, because you have to use it while it’s still really sensitive and you wrap it on that cake, it is going to show you every imperfection that’s there.”
This is the damage control layer. It prevents those (infuriating) crumbs from wiggling to the final layer, which is why a crumb coat is the most important step for decorating cakes. Think of it as a solid primer. While only ⅛ of an inch thick, it smooths everything out and prepares the cake for professional wrapping.
It’s a shame that chocolate doesn’t lie. Those telltale signs of heavy-handed spatula use or poorly mixed frosting will show through that final wrap, so keep the base layering clean. The best way to optimize results is by rehearsing basic application strategies, like letting the cake cool and leveling the torting first. If you’re feeling wobbly, practice crumb coating on spare pieces of cake beforehand.
Avoid white chocolate for an easier experience
The sweet creaminess of white chocolate creates a beautiful wrapped finish. But here’s the bubble burster: It’s not the ideal chocolate type for tempering. “White chocolate is the most difficult to temper,” Goldman reveals. “The darker the chocolate, the higher the percentage, the easier it is to temper.” With that said, Goldman doesn’t advocate a permanent ban. “As far as wrapping a cake goes, all three of them are pretty easy,” he admits. Perhaps avoid white chocolate initially, then progress to this lighter variety with practice.
Goldman also recommends coating chocolate as a confidence-builder. “If tempering chocolate scares you, never be afraid to use coating chocolate,” he says. “It’s just a different kind of chocolate that tastes a little like Easter candy as opposed to cream chocolate. That’s okay. People like Easter candy.” These coating chocolates utilize vegetable oil to achieve a better-spreading consistency and are easily purchased online. Take a look at Merckens Coating Melting Wafers or Ghirardelli Dark Chocolate Melting Wafers.
Trim the cardboard underneath the cake
Skipping cardboard is the dire mistake to avoid when decorating cakes on a turntable. However, it’s not as simple as adding that extra layer and calling it a job well done. Does the sizing actually align? Goldman has wise words of wisdom: “One thing I also like to make sure of if I’m wrapping a cake in chocolate is to trim the cardboard underneath the cake just slightly smaller than the cake itself,” he explains. “That way you can really get flush with the bottom of the cake.” Use scissors to trim it down. Or if the cake’s already comfortable on the cardboard, a cutting knife.
This professional tip doesn’t just achieve cleaner results, it also saves you a task later. “If you want to wrap some cakes and stack them up on top of each other, then you want to make sure that your chocolate goes all the way to the bottom, because if not, then you have to pipe a border,” Goldman says. “And when you pipe a border, it kind of ruins the effect of having those super clean cylinders just sitting on top of each other. That is difficult.” You can effectively can you dodge those messier tasks by cutting that cardboard.


